> ## Documentation Index
> Fetch the complete documentation index at: https://docs.kwebby.com/llms.txt
> Use this file to discover all available pages before exploring further.
# Theme editor basics
> How to edit pages, sections, blocks and theme settings.
Everything about Frosting's look is set in the **theme editor**. Your products, collections, pages, menus and discounts are set in the Shopify admin, and the theme displays them.
 ## Open the theme editor
Go to **Online Store → Themes** and click **Customize** next to Frosting.
## The parts of the editor
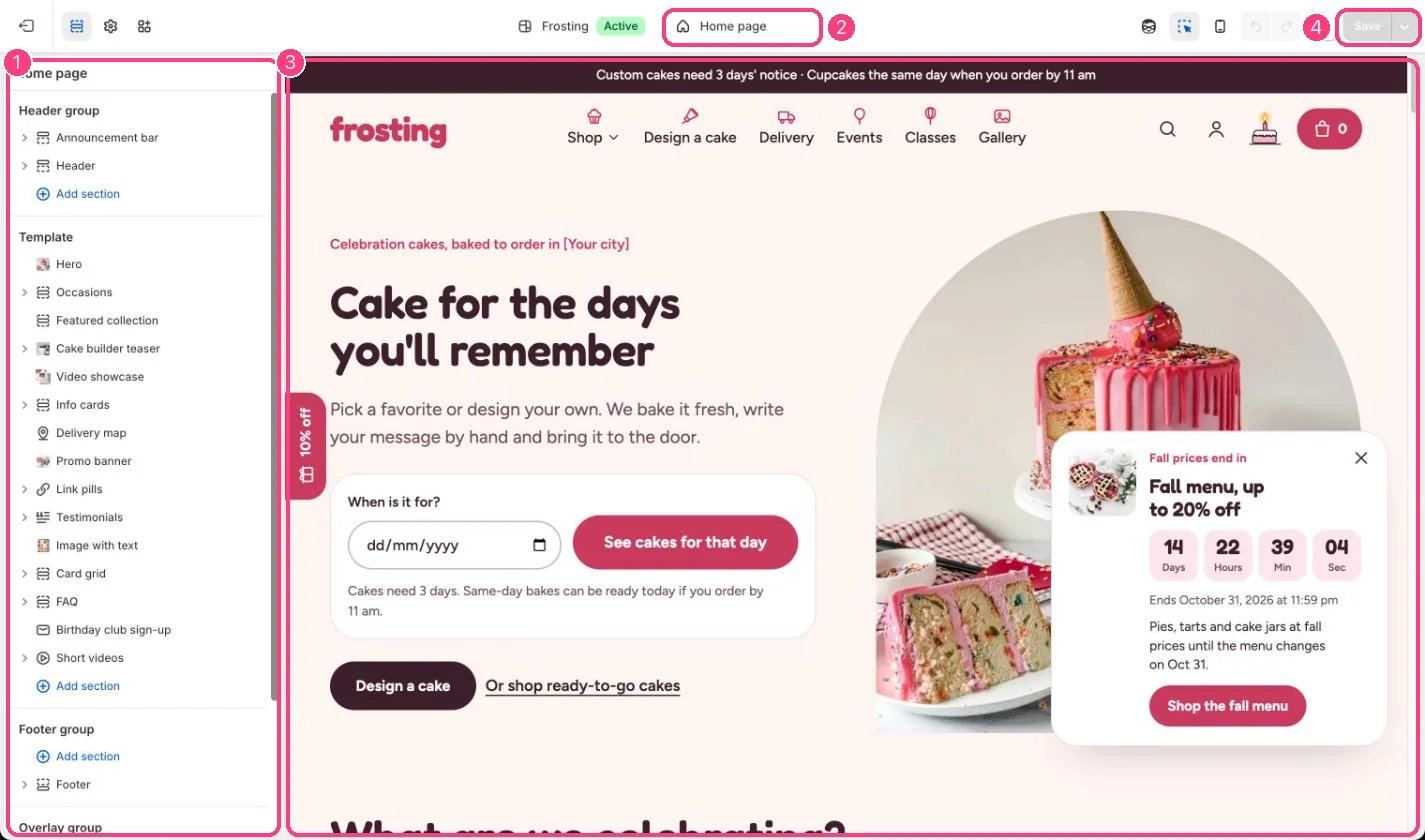
* **Page selector** (top of the screen): choose which page you are editing, such as Home page, Products, Collections, Pages or Cart. Each page type has its own template.
* **Sidebar** (left): the sections on that page, in order, with the **Header** group at the top and the **Footer** group at the bottom. The **Overlay group** holds the pop-ups: Local business, Sign-up popup and Sale timer.
* **Preview** (middle): your store as customers see it. Click anything in the preview to jump to its settings.
* **Settings panel** (right): the settings of whatever you selected.
## Sections and blocks
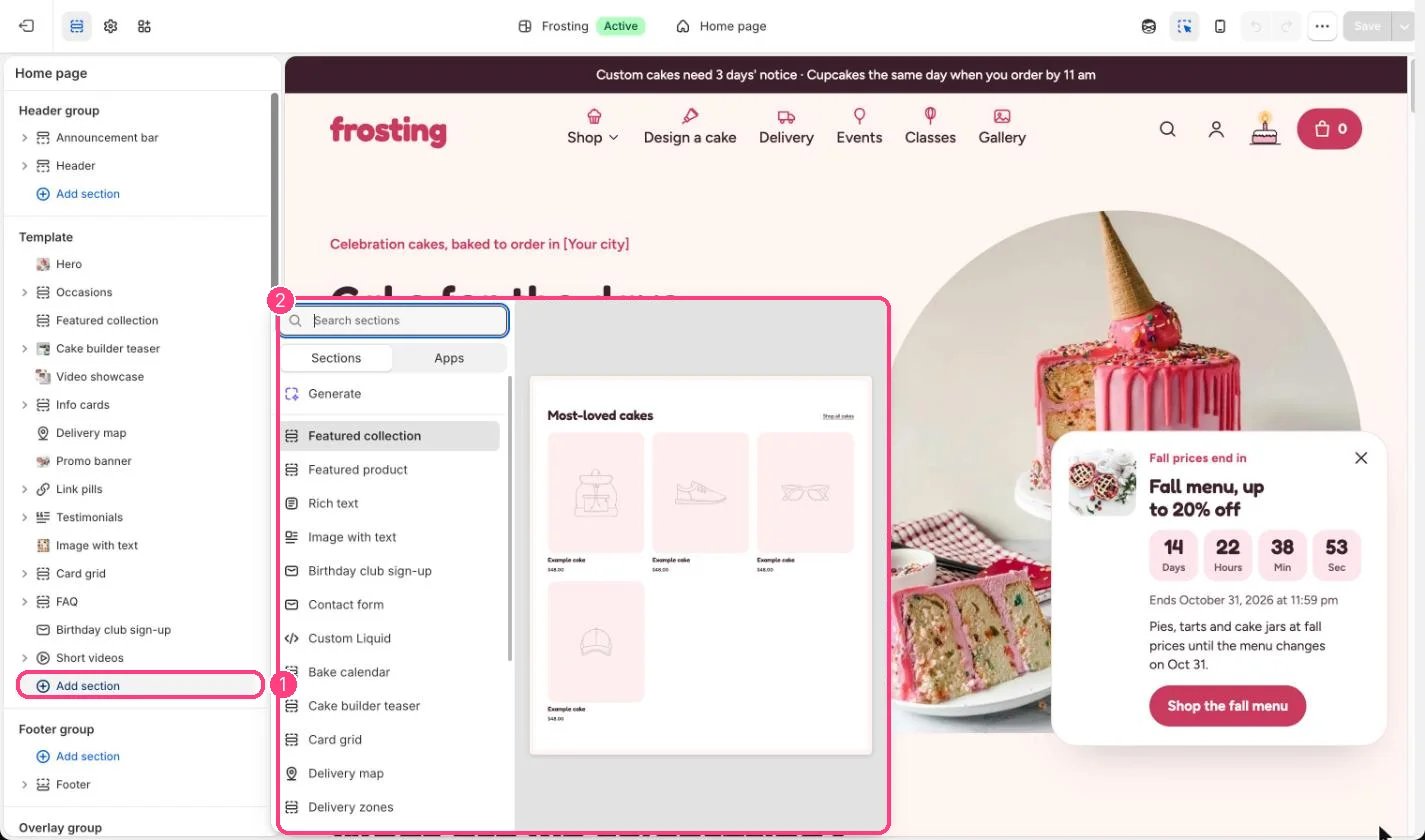
* **Add a section:** click **Add section** in the sidebar where you want it, and pick one from the list.
* **Add a block:** some sections hold repeatable items, called blocks, such as slides, questions or delivery areas. Expand the section and click **Add block**.
* **Reorder:** drag the handle beside a section or block.
* **Hide or remove:** click the eye icon to hide it without losing its settings, or open it and click **Remove section** / **Remove block**.
## Open the theme editor
Go to **Online Store → Themes** and click **Customize** next to Frosting.
## The parts of the editor
* **Page selector** (top of the screen): choose which page you are editing, such as Home page, Products, Collections, Pages or Cart. Each page type has its own template.
* **Sidebar** (left): the sections on that page, in order, with the **Header** group at the top and the **Footer** group at the bottom. The **Overlay group** holds the pop-ups: Local business, Sign-up popup and Sale timer.
* **Preview** (middle): your store as customers see it. Click anything in the preview to jump to its settings.
* **Settings panel** (right): the settings of whatever you selected.
## Sections and blocks
* **Add a section:** click **Add section** in the sidebar where you want it, and pick one from the list.
* **Add a block:** some sections hold repeatable items, called blocks, such as slides, questions or delivery areas. Expand the section and click **Add block**.
* **Reorder:** drag the handle beside a section or block.
* **Hide or remove:** click the eye icon to hide it without losing its settings, or open it and click **Remove section** / **Remove block**.
 ## Theme settings
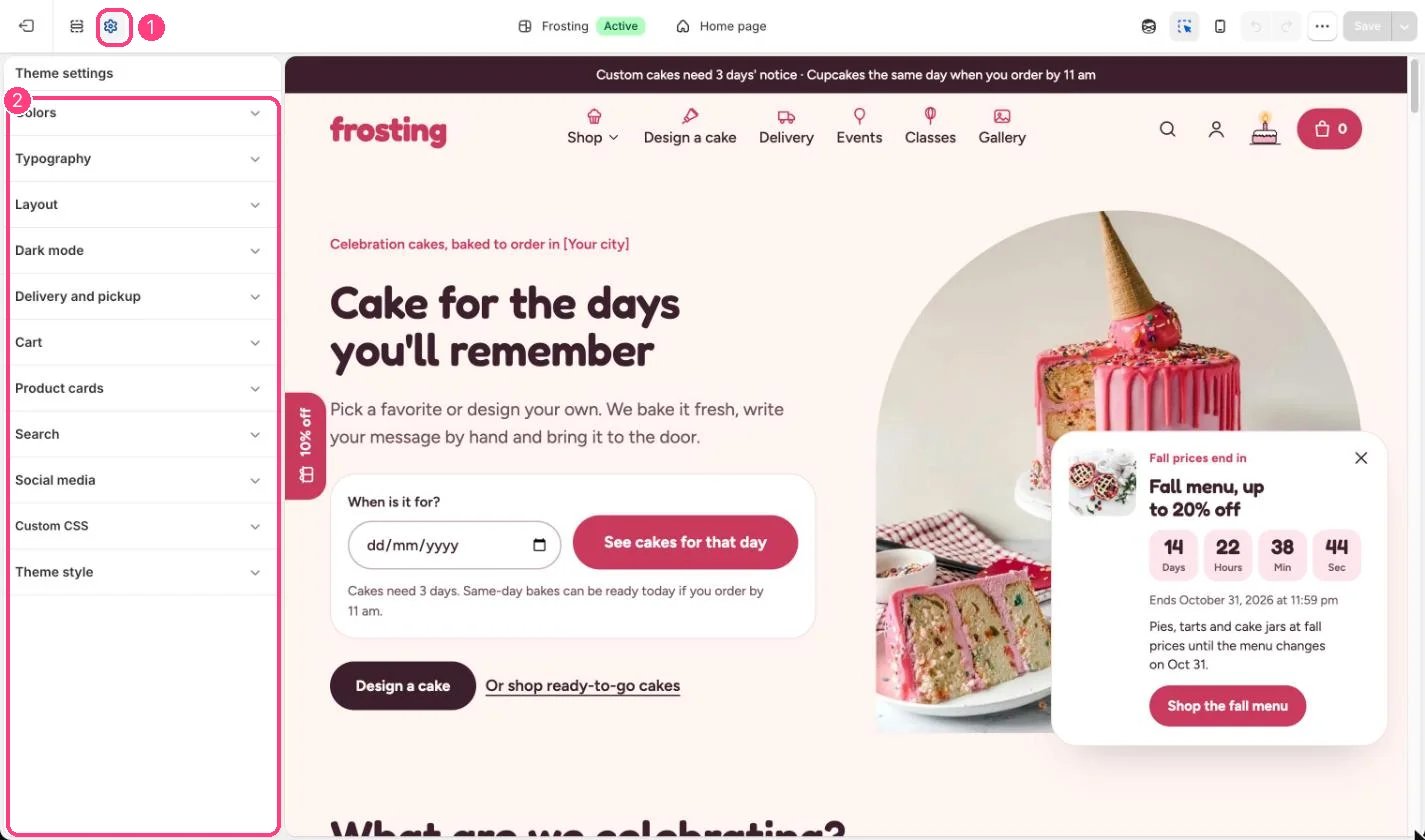
Click the **gear** icon (Theme settings) at the top of the left sidebar to change things that apply everywhere: colors (including the dark mode scheme), typography, layout (page width, favicon, logo text), dark mode, delivery and pickup, cart, product cards, search and social media.
## Theme settings
Click the **gear** icon (Theme settings) at the top of the left sidebar to change things that apply everywhere: colors (including the dark mode scheme), typography, layout (page width, favicon, logo text), dark mode, delivery and pickup, cart, product cards, search and social media.
 ## Save and preview
Click **Save** in the top-right corner. Use the device switcher at the top to check the mobile layout. Changes are not visible to customers until you save, and on an unpublished theme not until you publish.
This documentation is built and hosted on [Mintlify](https://mintlify.com), a developer documentation platform.
## Save and preview
Click **Save** in the top-right corner. Use the device switcher at the top to check the mobile layout. Changes are not visible to customers until you save, and on an unpublished theme not until you publish.
This documentation is built and hosted on [Mintlify](https://mintlify.com), a developer documentation platform.