> ## Documentation Index
> Fetch the complete documentation index at: https://docs.kwebby.com/llms.txt
> Use this file to discover all available pages before exploring further.
# Theme editor basics
> How to edit pages, sections, blocks and theme settings.
Everything about Puggy's look is set in the **theme editor**. Your products, collections, pages, menus and discounts are set in the Shopify admin, and the theme displays them.
 ## Open the theme editor
Go to **Online Store → Themes** and click **Customize** next to Puggy.
## The parts of the editor
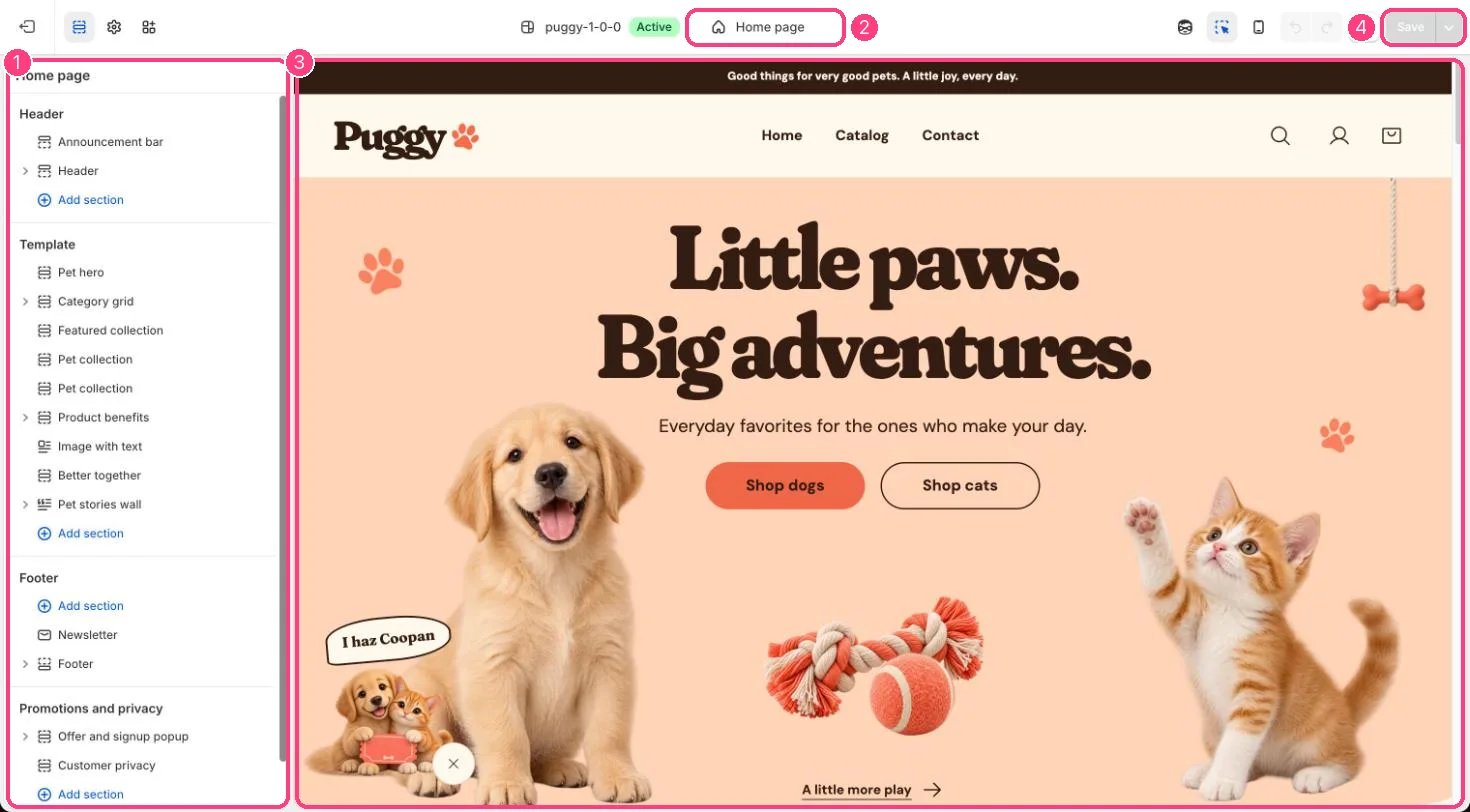
* **Page selector** (top of the screen): choose which page you are editing, such as Home page, Products, Collections, Pages or Cart.
* **Sidebar** (left): the sections on that page, with the **Header** group at the top and the **Footer** group at the bottom. The **Promotions and privacy** group holds the offer popup and the cookie banner.
* **Preview** (middle): your store as customers see it. Click anything to jump to its settings.
* **Settings panel** (right): the settings of whatever you selected.
## Sections and blocks
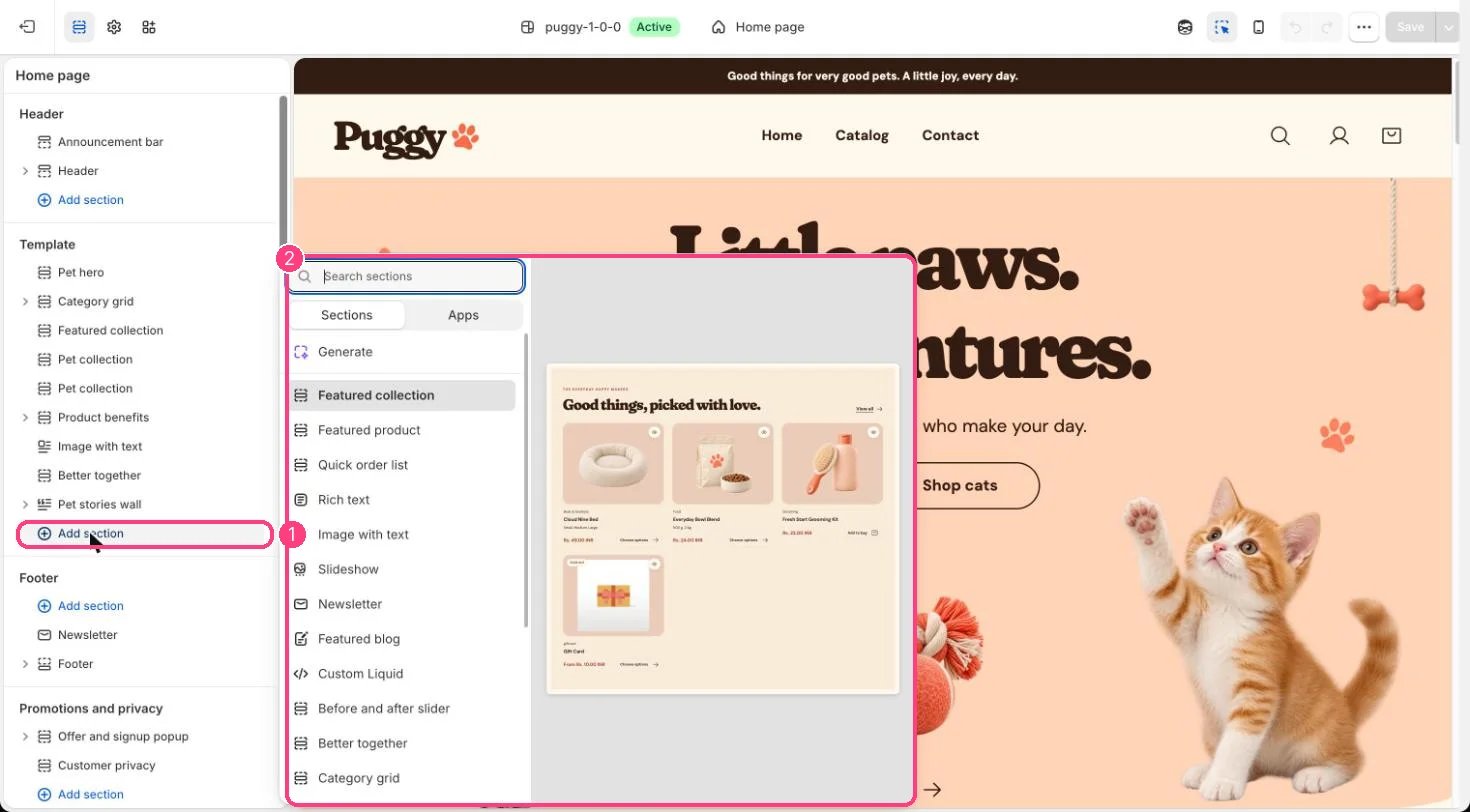
* **Add a section:** click **Add section** where you want it, and pick one from the list.
* **Add a block:** expand a section and click **Add block** to add a slide, category, question or similar item.
* **Reorder:** drag the handle beside a section or block.
* **Hide or remove:** use the eye icon to hide it, or open it and click **Remove**.
## Open the theme editor
Go to **Online Store → Themes** and click **Customize** next to Puggy.
## The parts of the editor
* **Page selector** (top of the screen): choose which page you are editing, such as Home page, Products, Collections, Pages or Cart.
* **Sidebar** (left): the sections on that page, with the **Header** group at the top and the **Footer** group at the bottom. The **Promotions and privacy** group holds the offer popup and the cookie banner.
* **Preview** (middle): your store as customers see it. Click anything to jump to its settings.
* **Settings panel** (right): the settings of whatever you selected.
## Sections and blocks
* **Add a section:** click **Add section** where you want it, and pick one from the list.
* **Add a block:** expand a section and click **Add block** to add a slide, category, question or similar item.
* **Reorder:** drag the handle beside a section or block.
* **Hide or remove:** use the eye icon to hide it, or open it and click **Remove**.
 ## Theme settings
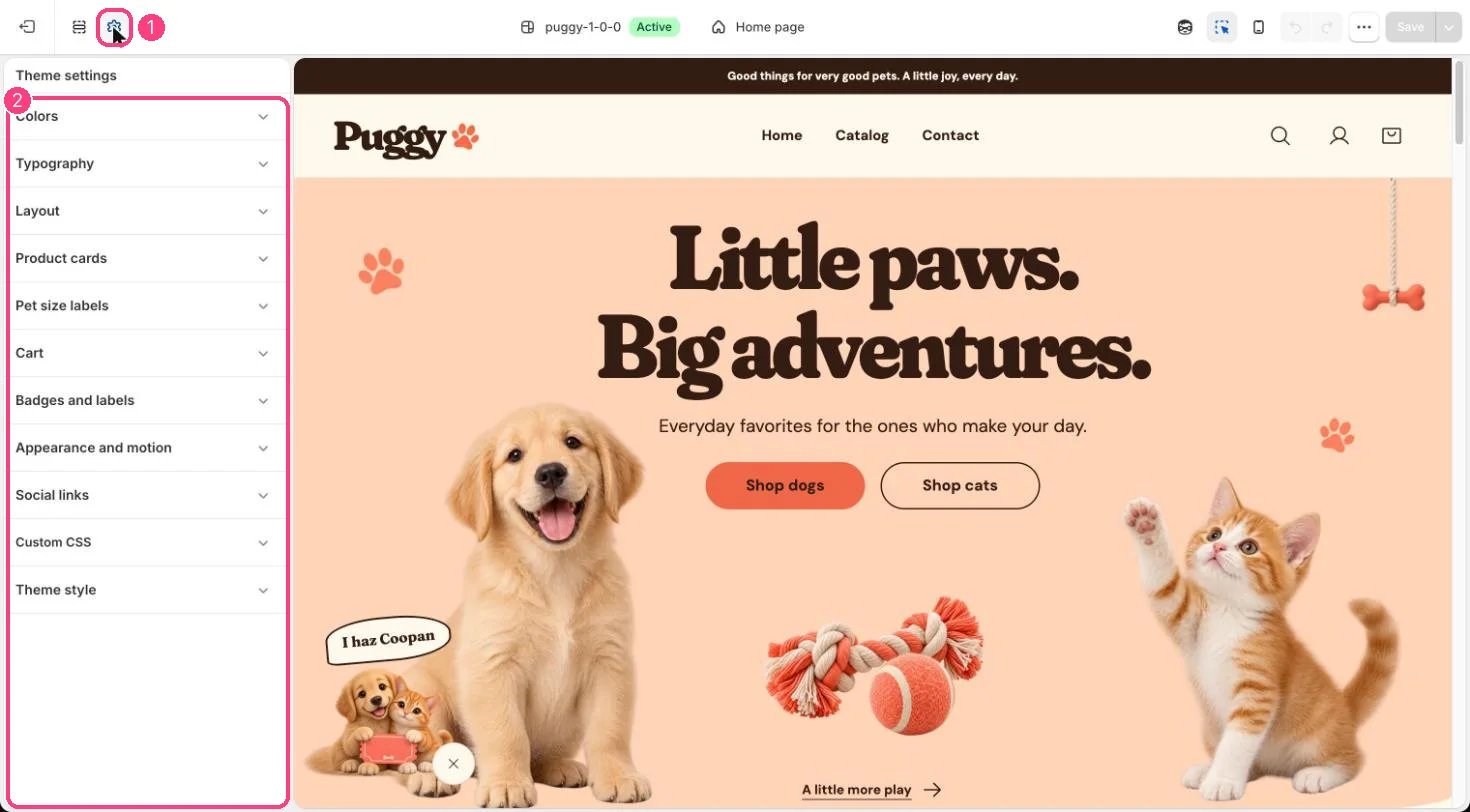
Click the **gear** icon (Theme settings) at the top of the left sidebar to change what applies everywhere: colors, typography, layout and logo, product cards, pet size labels, cart, badges and labels, appearance and motion, and social links.
## Theme settings
Click the **gear** icon (Theme settings) at the top of the left sidebar to change what applies everywhere: colors, typography, layout and logo, product cards, pet size labels, cart, badges and labels, appearance and motion, and social links.
 ## Save and preview
Click **Save** in the top-right corner, and use the device switcher at the top to check the mobile layout.
This documentation is built and hosted on [Mintlify](https://mintlify.com), a developer documentation platform.
## Save and preview
Click **Save** in the top-right corner, and use the device switcher at the top to check the mobile layout.
This documentation is built and hosted on [Mintlify](https://mintlify.com), a developer documentation platform.