> ## Documentation Index
> Fetch the complete documentation index at: https://docs.kwebby.com/llms.txt
> Use this file to discover all available pages before exploring further.
# Before and after slider
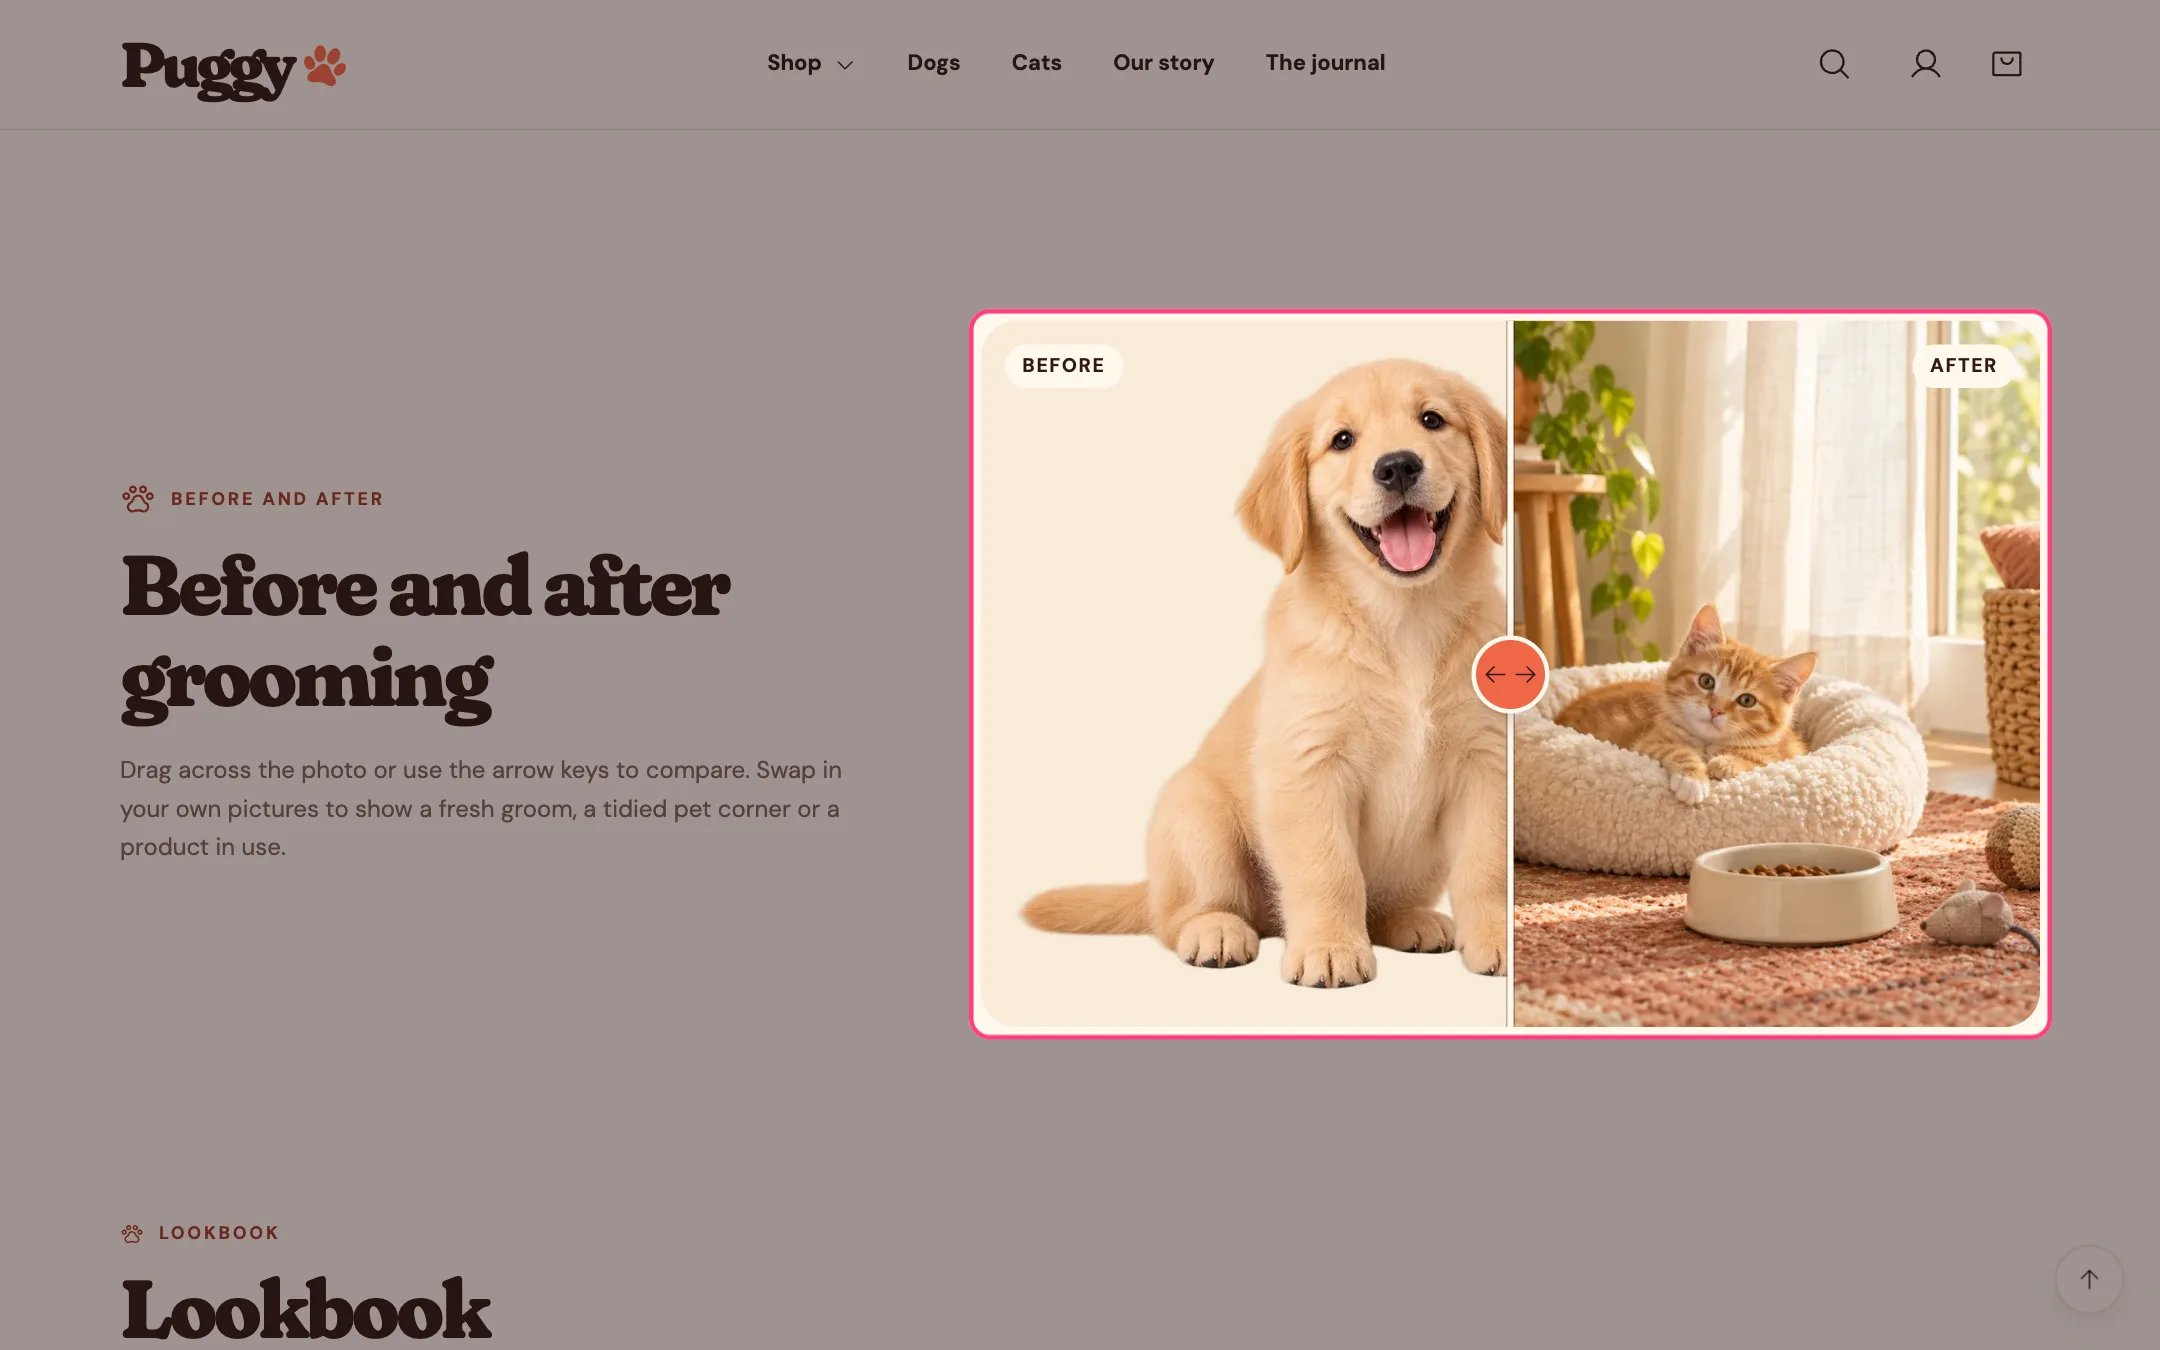
> Two images stacked with a slider between them, so shoppers can drag to compare before and after, such as a fresh groom.
 ## Where to find it
Not on a default template. Add it to any page with Add section > Before and after slider.
## How it works
* Shoppers drag anywhere on the image, tap a spot to jump there, or use the arrow keys on the slider handle.
* On touch screens, swiping up and down still scrolls the page; sideways drags move the slider.
* A label marks each side, and the image opens at your starting position.
* Without images, built-in pet artwork shows the effect.
## Where to find it
Not on a default template. Add it to any page with Add section > Before and after slider.
## How it works
* Shoppers drag anywhere on the image, tap a spot to jump there, or use the arrow keys on the slider handle.
* On touch screens, swiping up and down still scrolls the page; sideways drags move the slider.
* A label marks each side, and the image opens at your starting position.
* Without images, built-in pet artwork shows the effect.
 ## Edit it
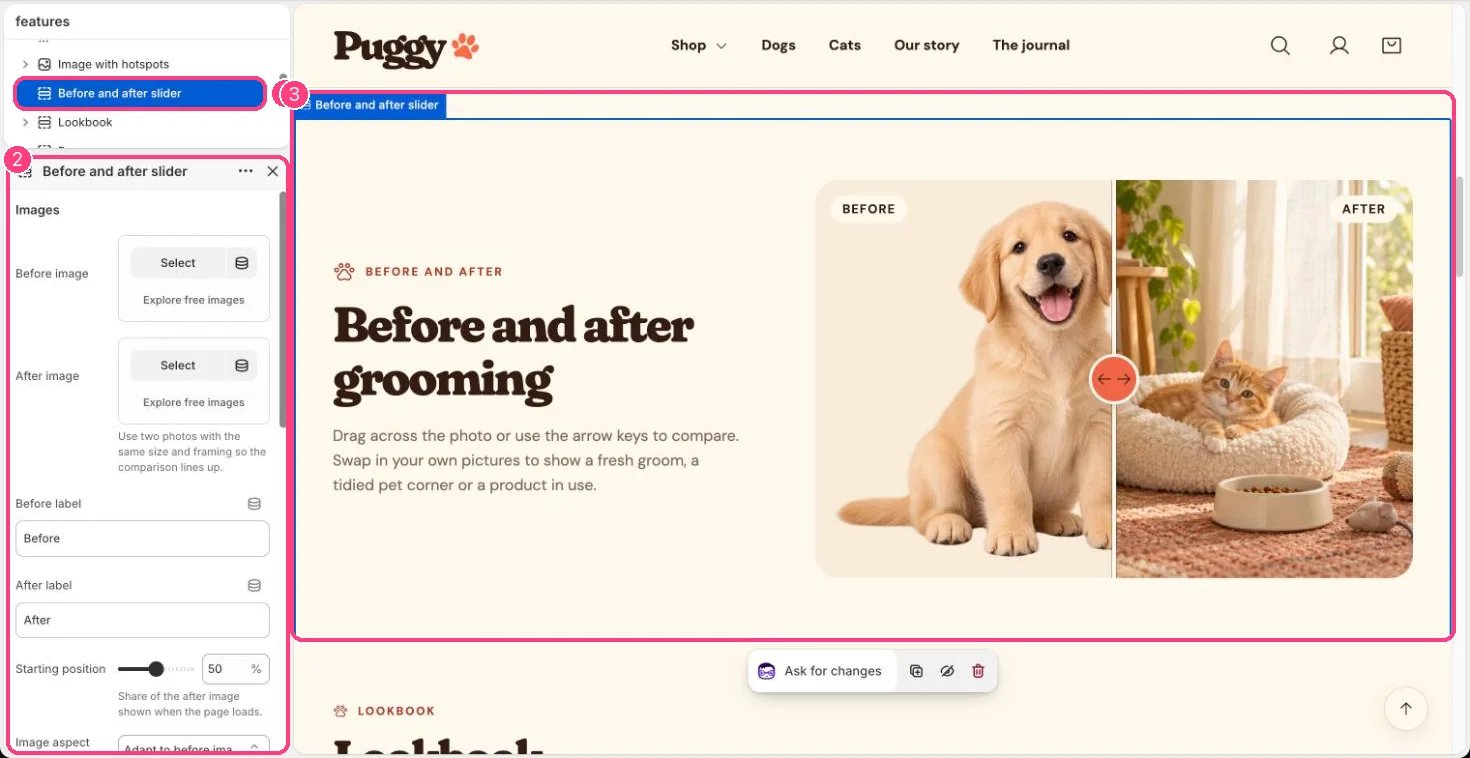
* Upload a Before image and an After image with the same size and framing so they line up.
* Edit Before label and After label, and set Starting position (the share of the after image shown at first).
* Choose Image aspect ratio: Adapt to before image, Square, Landscape or Portrait.
* Edit Eyebrow, Heading and Text, and set Text position (Above images or Beside images).
## Settings
**Images**
| Setting | What it does |
| - | - |
| **Before image** | Image: upload one or choose from Content → Files. |
| **After image** | Image: upload one or choose from Content → Files. Use two photos with the same size and framing so the comparison lines up. |
| **Before label** | Text. Default: Before. |
| **After label** | Text. Default: After. |
| **Starting position** | Slider from 0 to 100 %, in steps of 5. Share of the after image shown when the page loads. Default: 50 %. |
| **Image aspect ratio** | Options: Adapt to before image, Square, Landscape, Portrait. Default: Adapt to before image. |
**Text**
| Setting | What it does |
| - | - |
| **Eyebrow** | Text. Default: Before and after. |
| **Heading** | Text. Default: Slide to see the difference. |
| **Text** | Formatted text. |
| **Text position** | Options: Above images, Beside images. Default: Beside images. |
| **Color scheme** | Color scheme for this area (edit the schemes in Theme settings → Colors). Default: Scheme 1. |
| **Top spacing** | Slider from 0 to 120 px, in steps of 4. Default: 64 px. |
| **Bottom spacing** | Slider from 0 to 120 px, in steps of 4. Default: 64 px. |
Show honest comparisons. Don't edit photos in a way that overstates what a product or service does.
This documentation is built and hosted on [Mintlify](https://mintlify.com), a developer documentation platform.
## Edit it
* Upload a Before image and an After image with the same size and framing so they line up.
* Edit Before label and After label, and set Starting position (the share of the after image shown at first).
* Choose Image aspect ratio: Adapt to before image, Square, Landscape or Portrait.
* Edit Eyebrow, Heading and Text, and set Text position (Above images or Beside images).
## Settings
**Images**
| Setting | What it does |
| - | - |
| **Before image** | Image: upload one or choose from Content → Files. |
| **After image** | Image: upload one or choose from Content → Files. Use two photos with the same size and framing so the comparison lines up. |
| **Before label** | Text. Default: Before. |
| **After label** | Text. Default: After. |
| **Starting position** | Slider from 0 to 100 %, in steps of 5. Share of the after image shown when the page loads. Default: 50 %. |
| **Image aspect ratio** | Options: Adapt to before image, Square, Landscape, Portrait. Default: Adapt to before image. |
**Text**
| Setting | What it does |
| - | - |
| **Eyebrow** | Text. Default: Before and after. |
| **Heading** | Text. Default: Slide to see the difference. |
| **Text** | Formatted text. |
| **Text position** | Options: Above images, Beside images. Default: Beside images. |
| **Color scheme** | Color scheme for this area (edit the schemes in Theme settings → Colors). Default: Scheme 1. |
| **Top spacing** | Slider from 0 to 120 px, in steps of 4. Default: 64 px. |
| **Bottom spacing** | Slider from 0 to 120 px, in steps of 4. Default: 64 px. |
Show honest comparisons. Don't edit photos in a way that overstates what a product or service does.
This documentation is built and hosted on [Mintlify](https://mintlify.com), a developer documentation platform.