
Sale tags on product cards

Sale and % off tags with struck prices
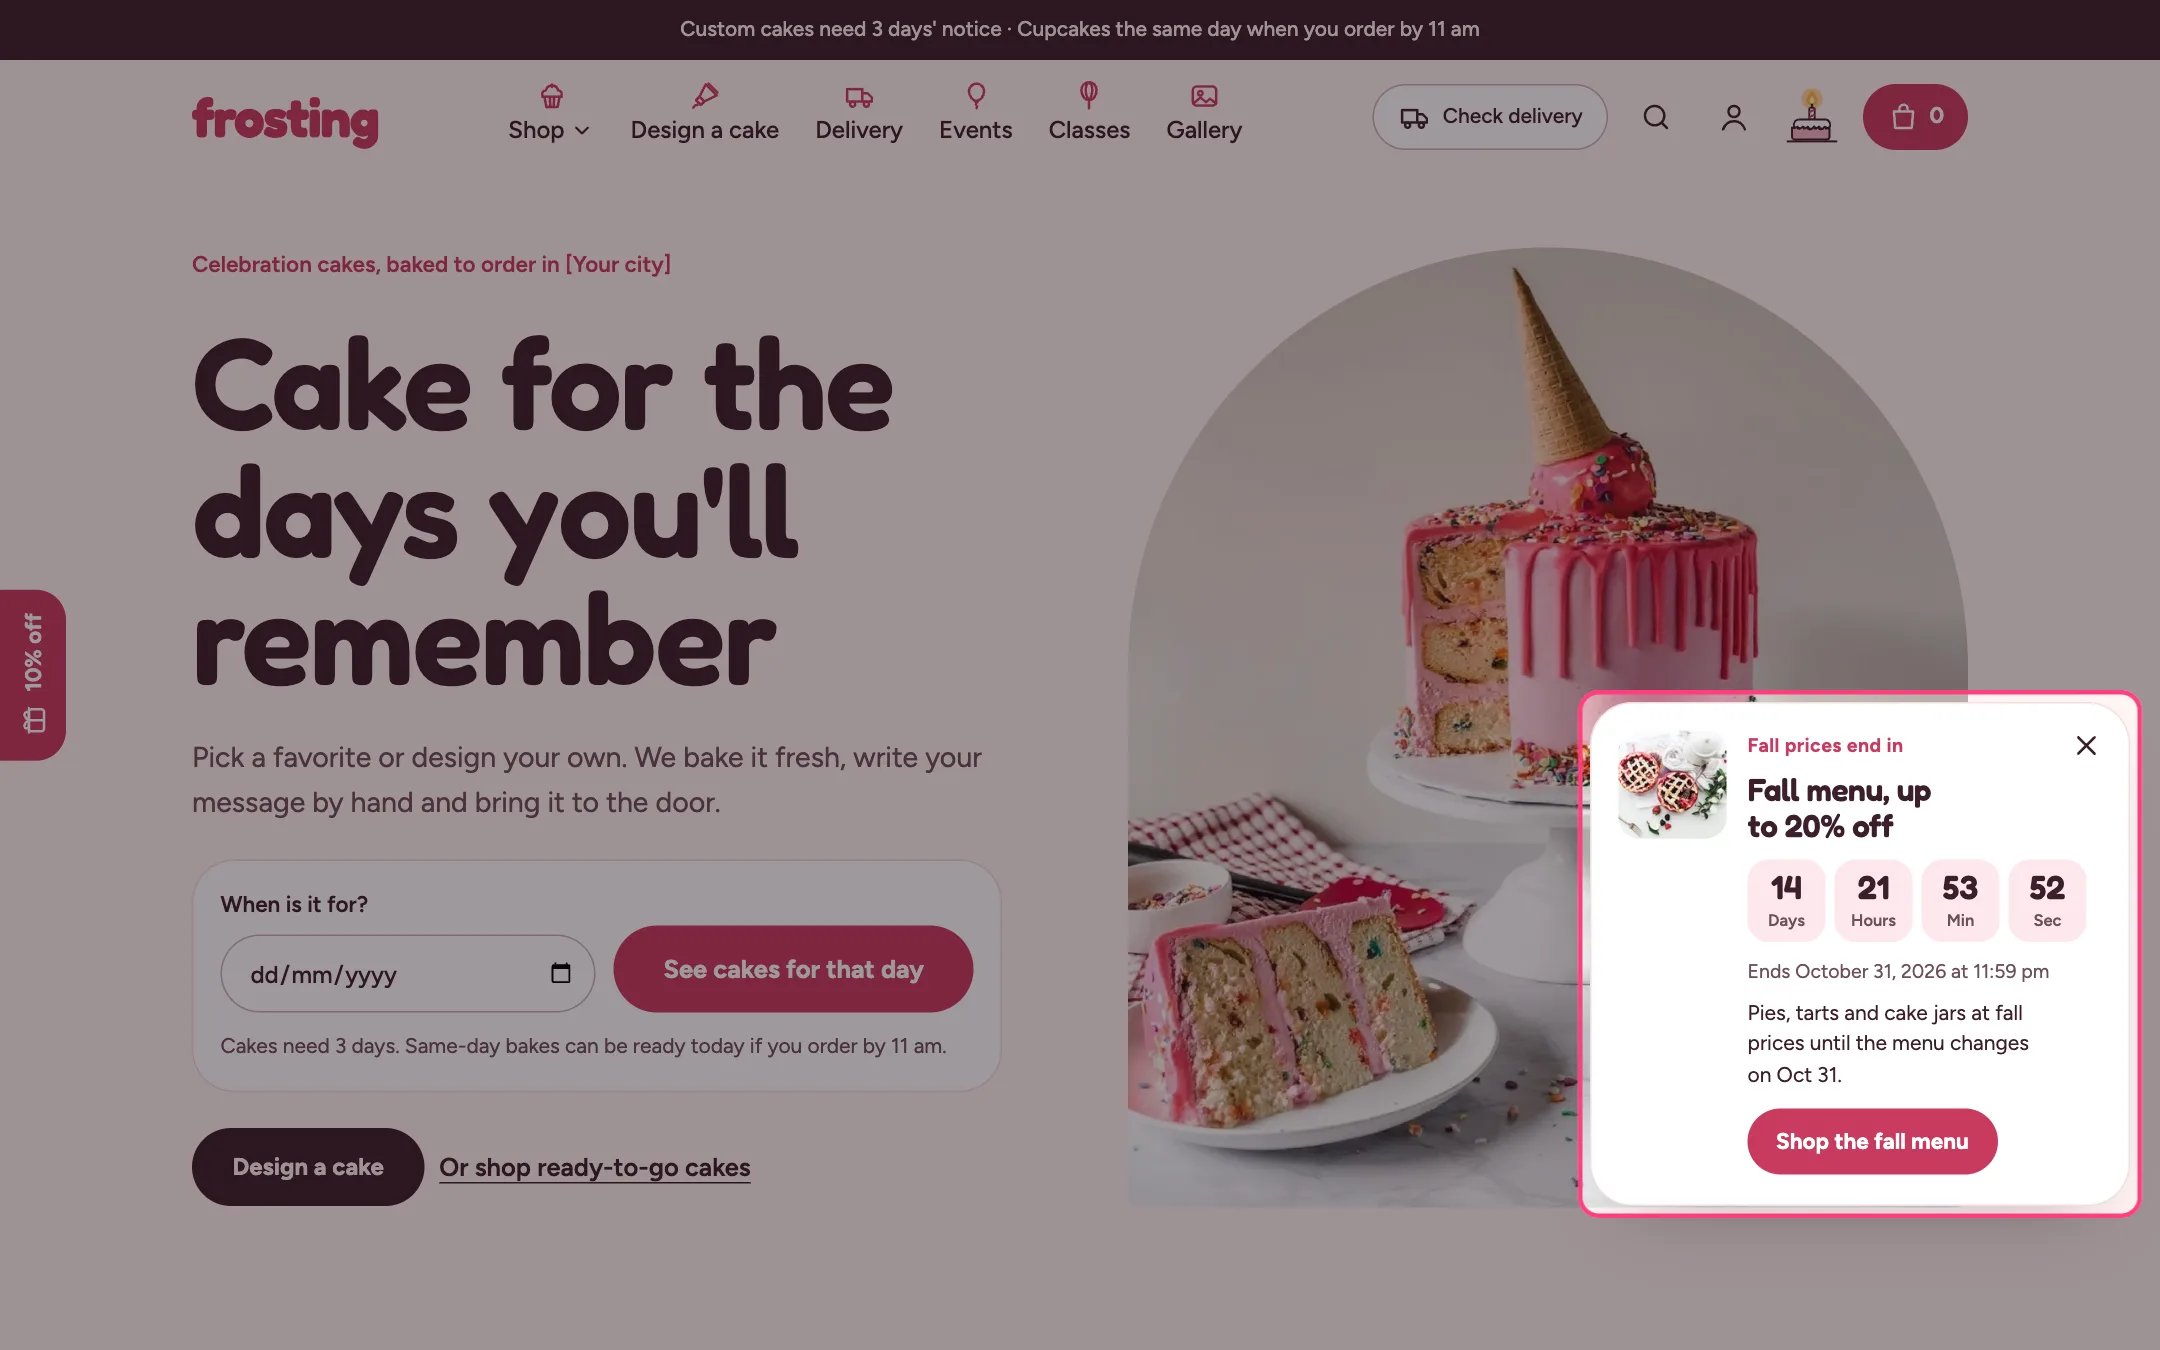
The sale timer

The sale timer slides in from the right
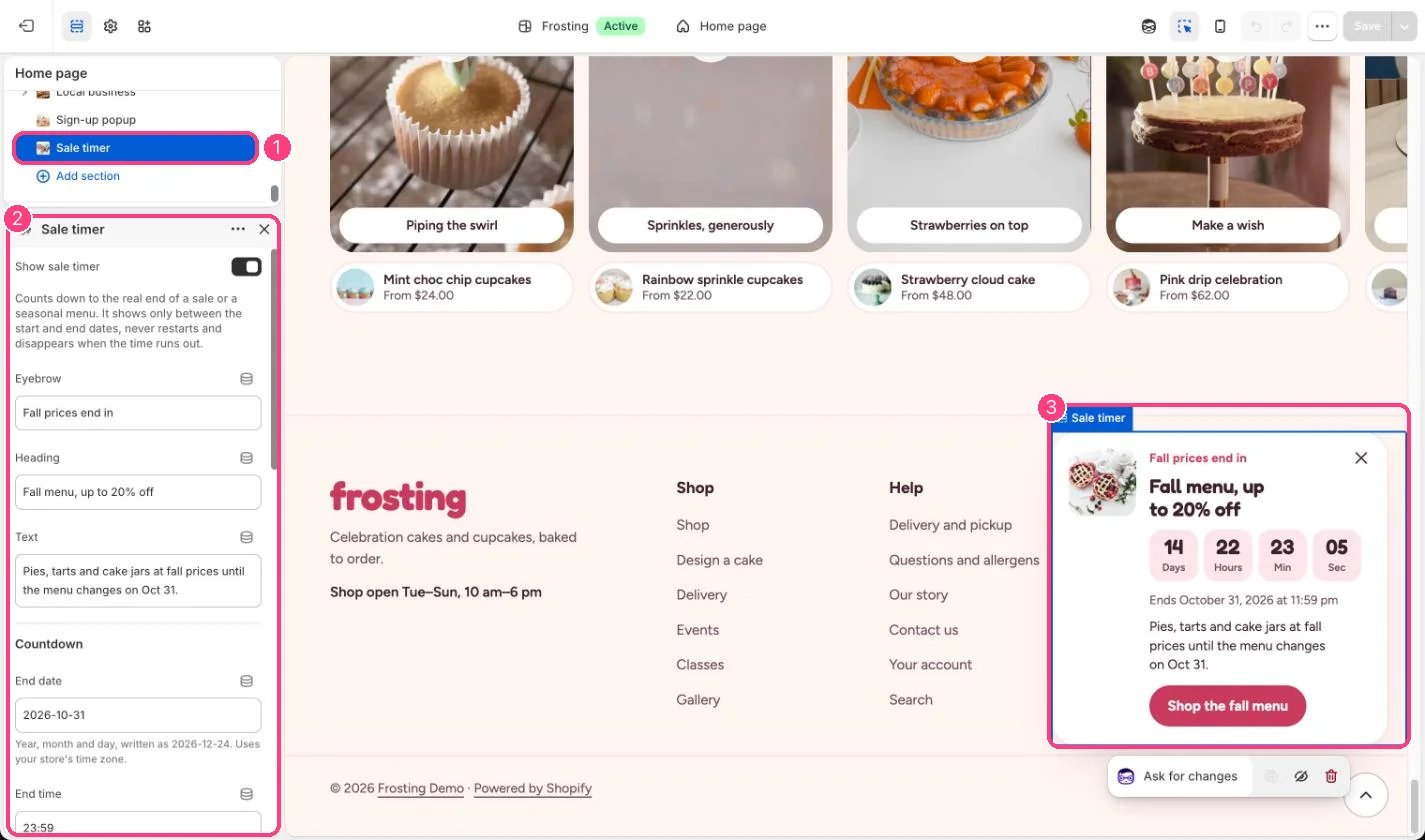
Sale timer settings

1 Sale timer in the Overlay group · 2 its settings · 3 the card

1. Put a product on sale. In the product, set Compare-at price higher than Price on each variant on sale. Product cards, the product page and cart lines then show the original price struck through. 2. Choose the sale tag. In Theme settings, Product cards, Sale badge, choose Sale and percentage off, Percentage off, Amount saved, Sale, or None. When sizes are discounted by different amounts, cards say Up to 20% off or Save up to $10. The product page shows the tag for the chosen size. 3. Group the sale. Tag the sale products, for example fall-menu, and make a smart collection from the tag, so the banner and timer can link to it. 4. Add the sale timer. In the theme editor, select Sale timer under Overlay group and tick Show sale timer. Set the End date (for example 2026-10-31) and End time on the 24-hour clock in your store’s time zone. Add a Start date if it begins later. 5. Add a code if you need one. Create the discount in Shopify admin, Discounts, with the same end date, then add its code to the timer. Shoppers can copy it from the card. How the timer behaves. The card slides in from the right after the delay. Closing it leaves a small tab on the right edge that keeps counting. It shows only between the start and end, never restarts, and removes itself when the time runs out, so the urgency is real. Promote it. Use the Promo banner on the home page and an Announcement for the same sale, and link both to the sale collection.