
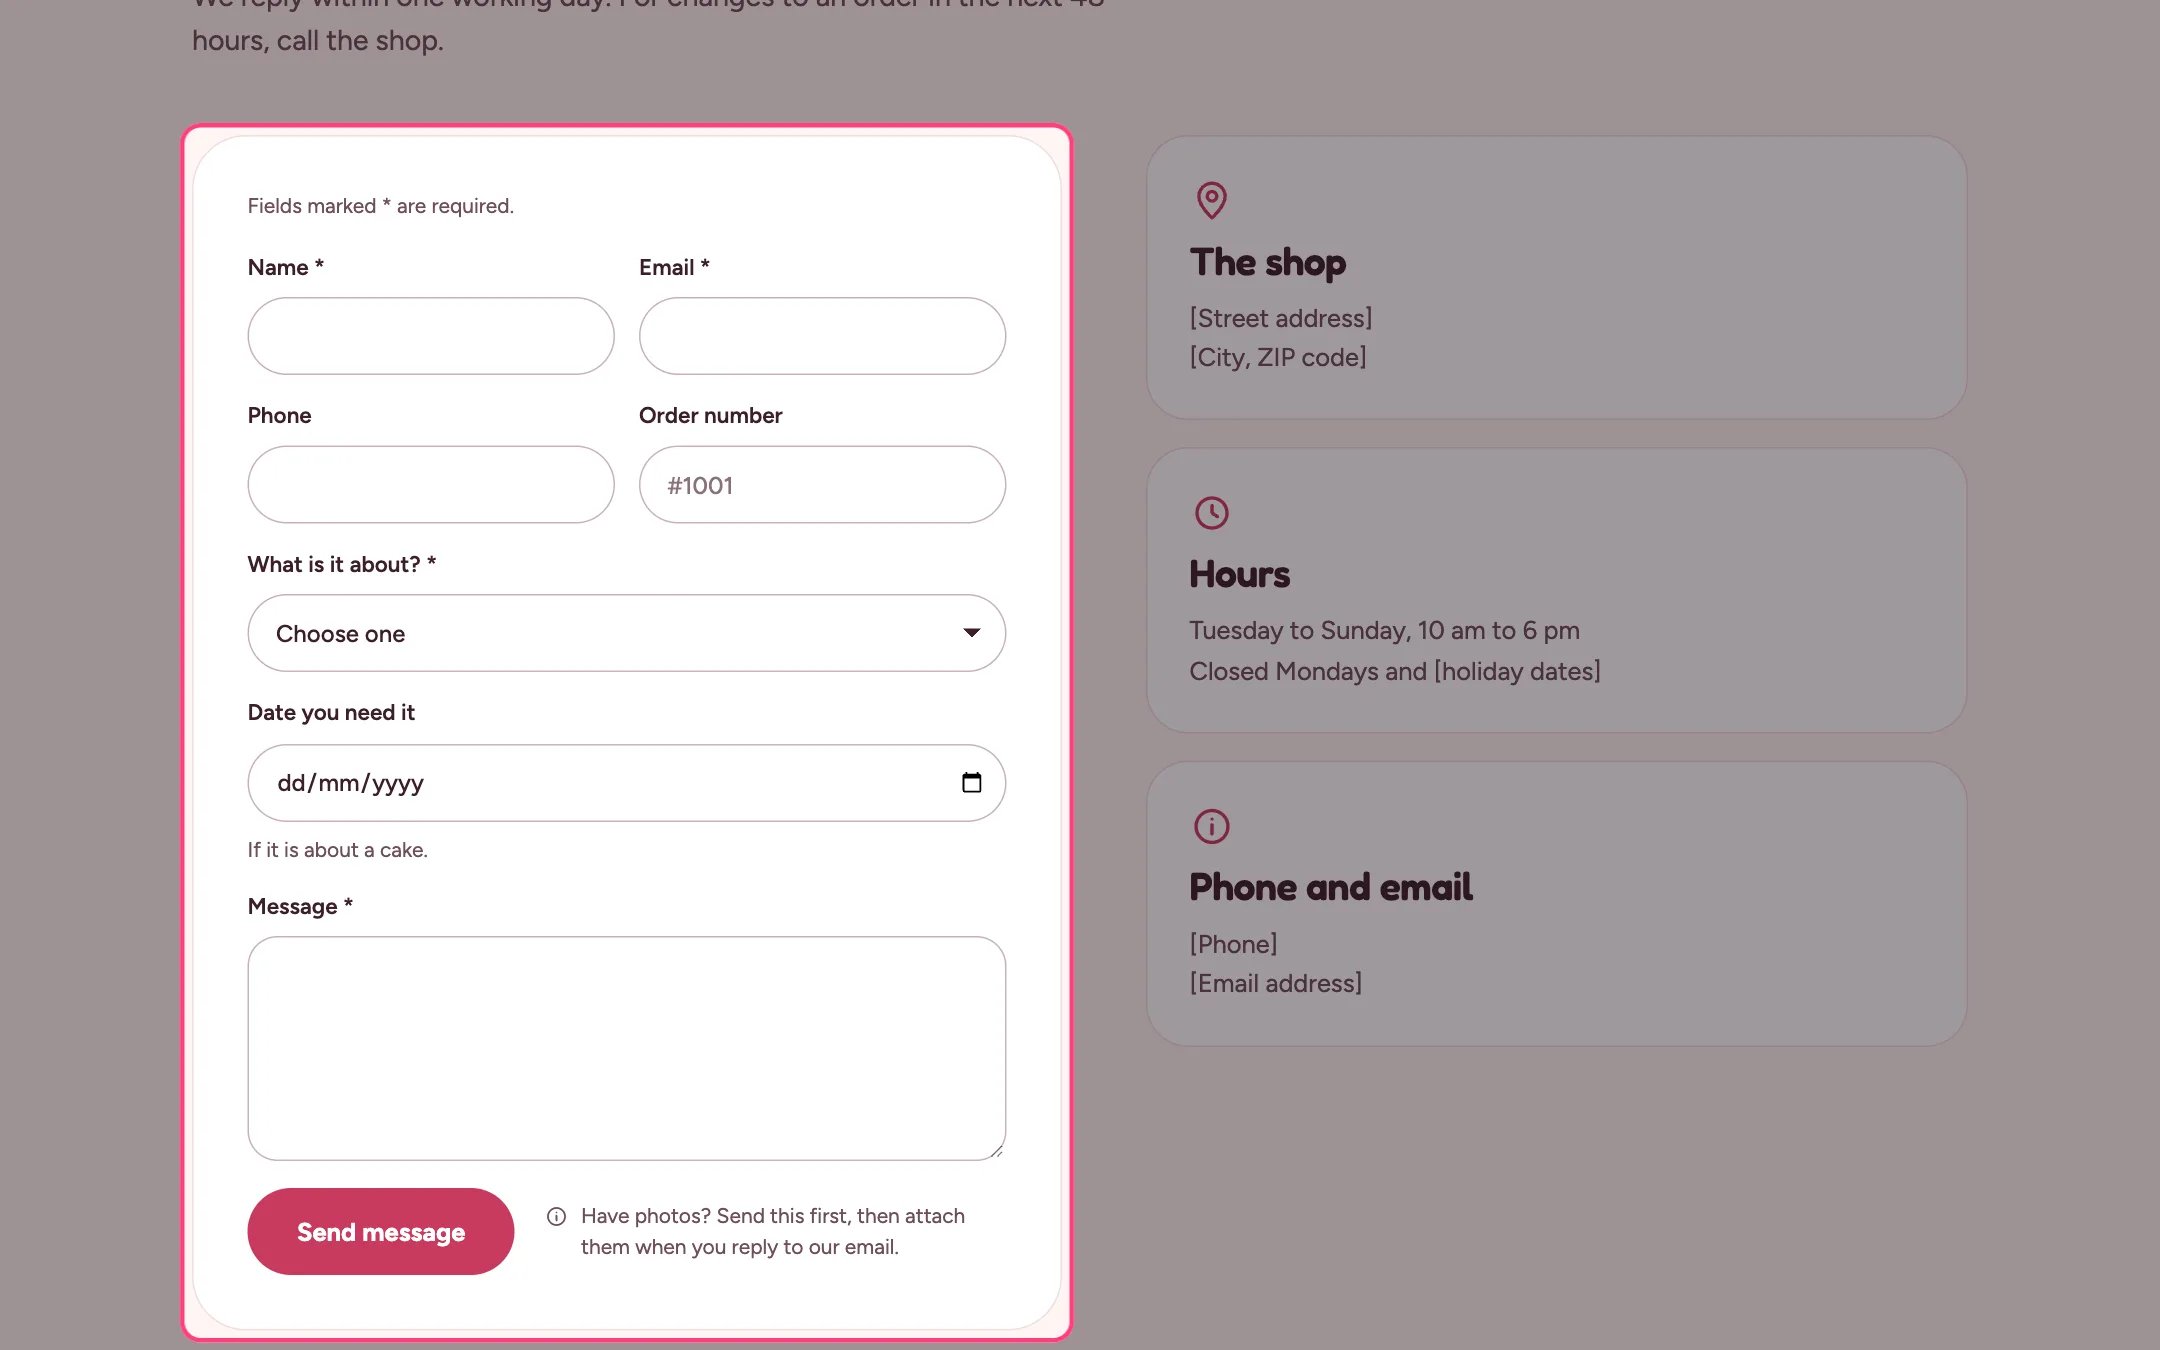
Contact form, highlighted on the demo store
Where to find it
The contact page and the events page (as a quote form). In the theme editor choose Pages, then contact, and select Contact form. Can be added to any page.How it works
- Field types: text, email, phone, number, date, paragraph, dropdown and checkbox. Up to 30 blocks in all.
- Fields are checked in the browser before sending; errors show next to the field.
- Date fields can refuse past dates with Only allow today or later.
- Text blocks add notes inside the form or in the side column, with an optional icon.
- Messages go to the sender email in Settings, Notifications. If no Email field exists, the form adds one.
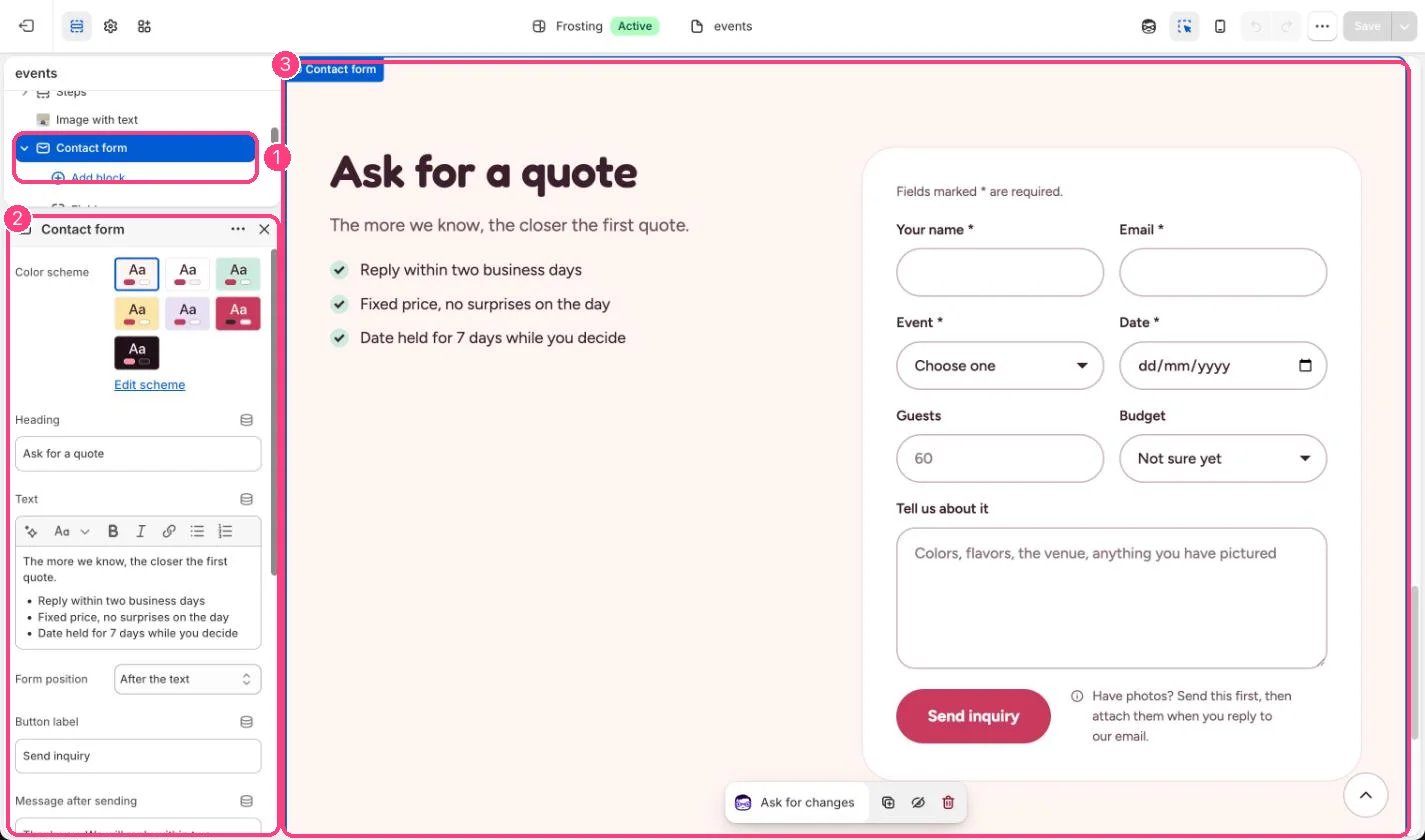
In the theme editor: 1 the section in the sidebar · 2 its settings · 3 the section in the preview
Edit it
- Add Field blocks and set the Label; the label also names the answer in the email you receive.
- For a dropdown, type one option per line.
- Set an Anchor such as quote, then link a button to #quote.
- Choose Form position to put the form before or after the text.
- Keep Show photo note on so shoppers know to attach photos when they reply.
Settings
Blocks
Up to 30 blocks. Add a block with Add block under the section in the sidebar; drag blocks to reorder them.Field
Text
Shopify contact forms cannot take file uploads.