
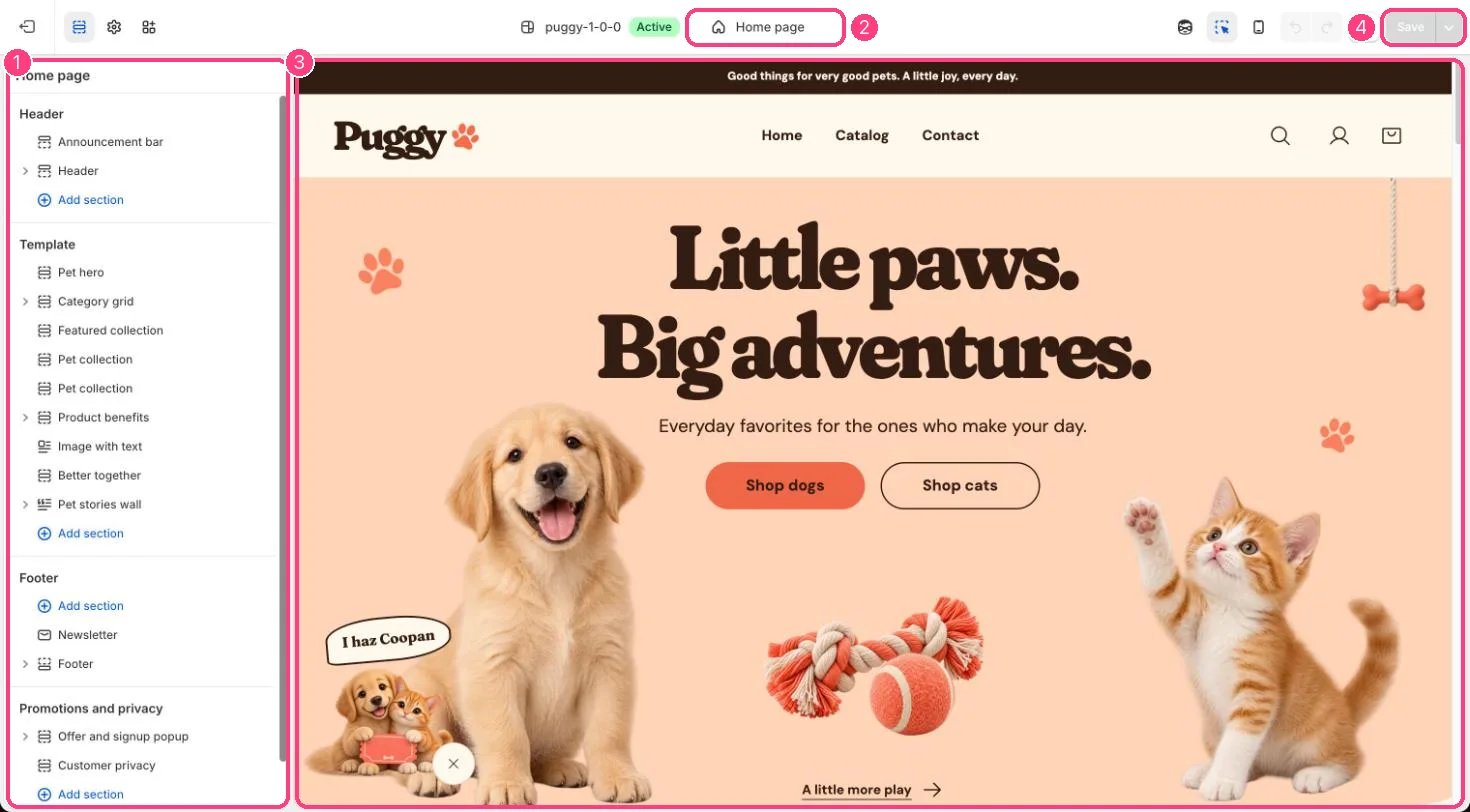
The theme editor: page selector, sidebar, preview and settings
Open the theme editor
Go to Online Store → Themes and click Customize next to Puggy.The parts of the editor
- Page selector (top of the screen): choose which page you are editing, such as Home page, Products, Collections, Pages or Cart.
- Sidebar (left): the sections on that page, with the Header group at the top and the Footer group at the bottom. The Promotions and privacy group holds the offer popup and the cookie banner.
- Preview (middle): your store as customers see it. Click anything to jump to its settings.
- Settings panel (right): the settings of whatever you selected.
Sections and blocks
- Add a section: click Add section where you want it, and pick one from the list.
- Add a block: expand a section and click Add block to add a slide, category, question or similar item.
- Reorder: drag the handle beside a section or block.
- Hide or remove: use the eye icon to hide it, or open it and click Remove.
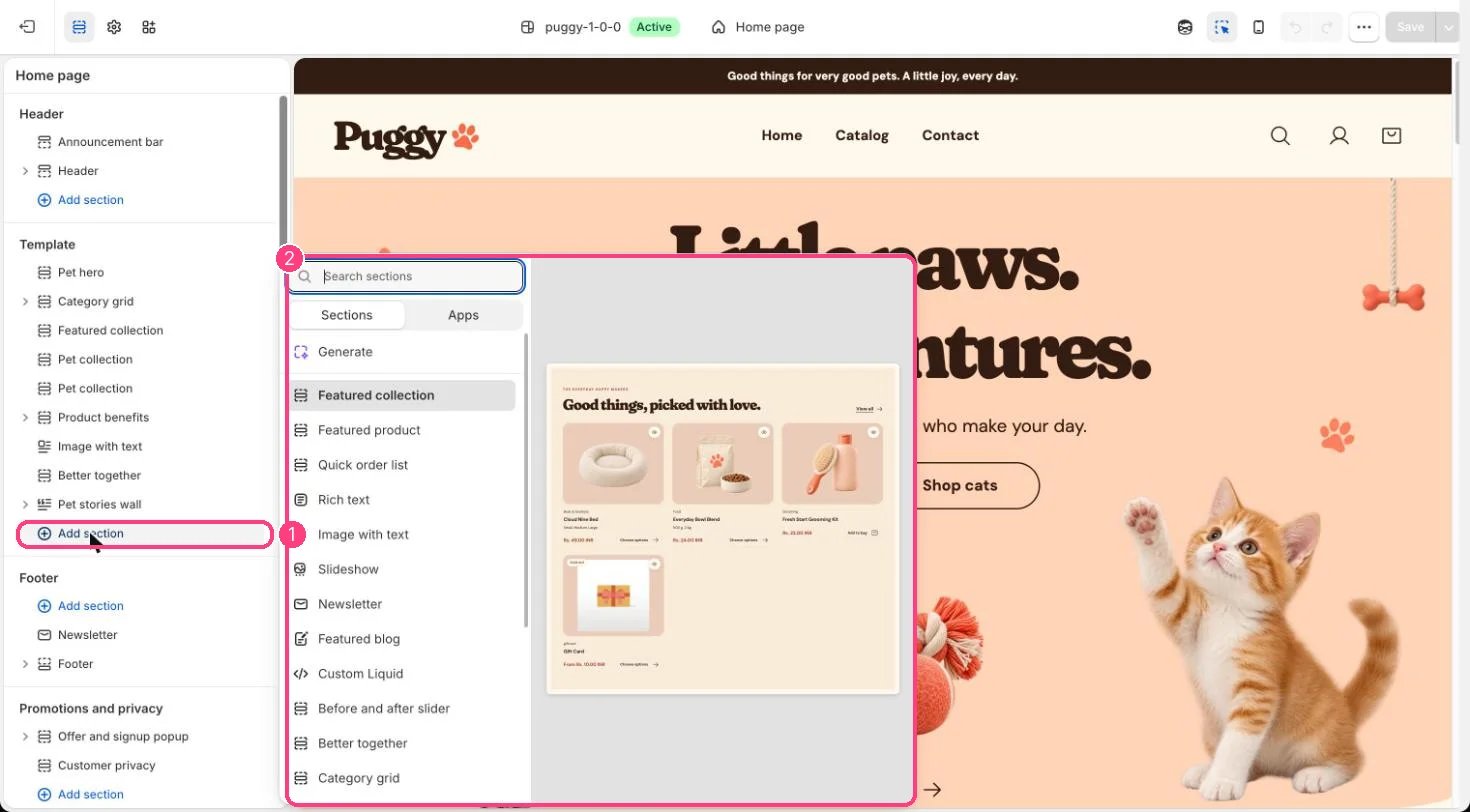
Add section opens the list of sections you can add
Theme settings
Click the gear icon (Theme settings) at the top of the left sidebar to change what applies everywhere: colors, typography, layout and logo, product cards, pet size labels, cart, badges and labels, appearance and motion, and social links.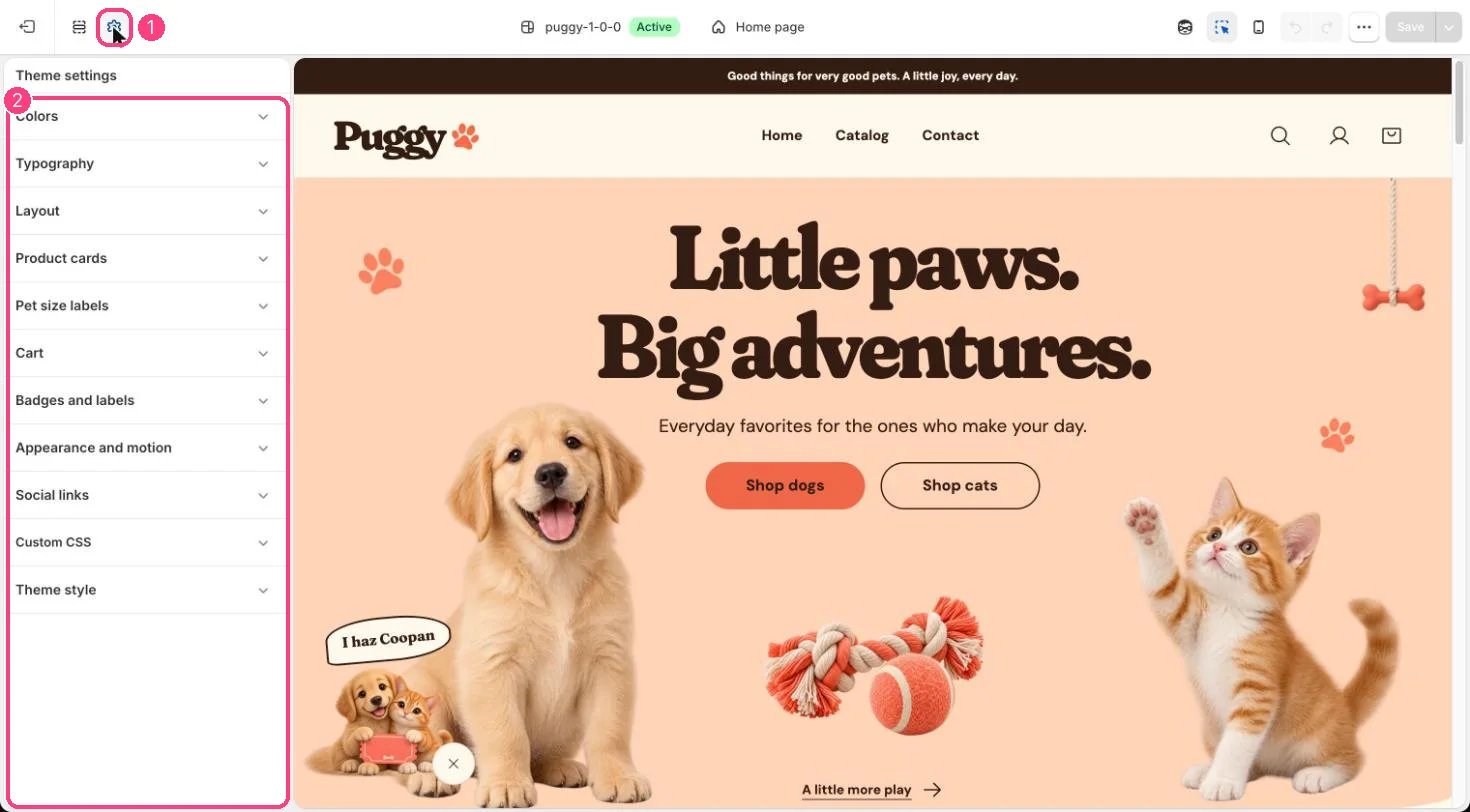
Theme settings: settings that apply to the whole store