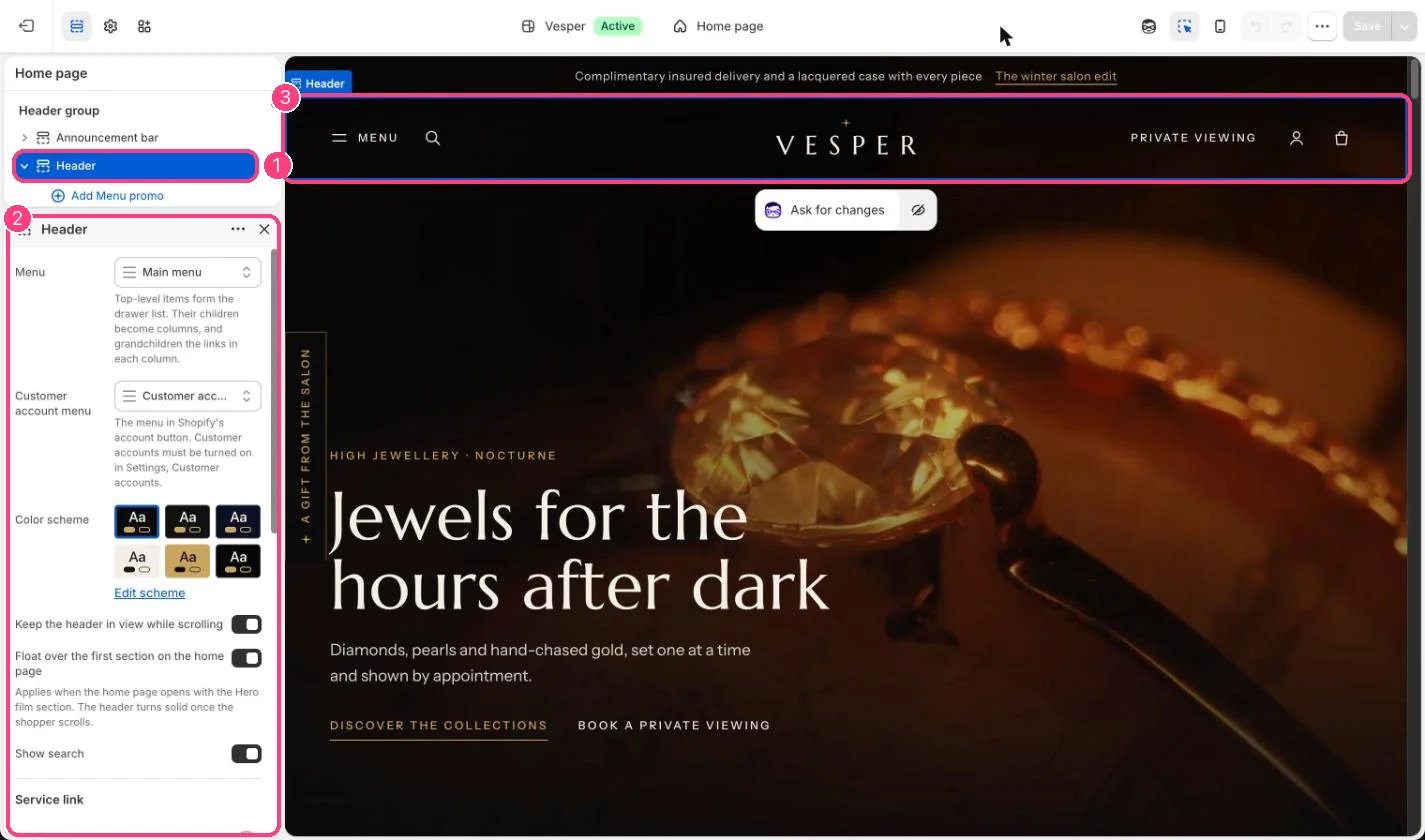
Gloaming’s main menu opens in a drawer from the menu button at the top of every page, on desktop and phones alike. 1. Build the main menu. In Online Store, Navigation, edit Main menu in three levels:
  • top-level items, such as High jewelry, Jewelry, Bridal and Gifts, form the list in the drawer;
  • their children become columns, such as By category;
  • the grandchildren become the links in each column, such as Rings or Earrings.
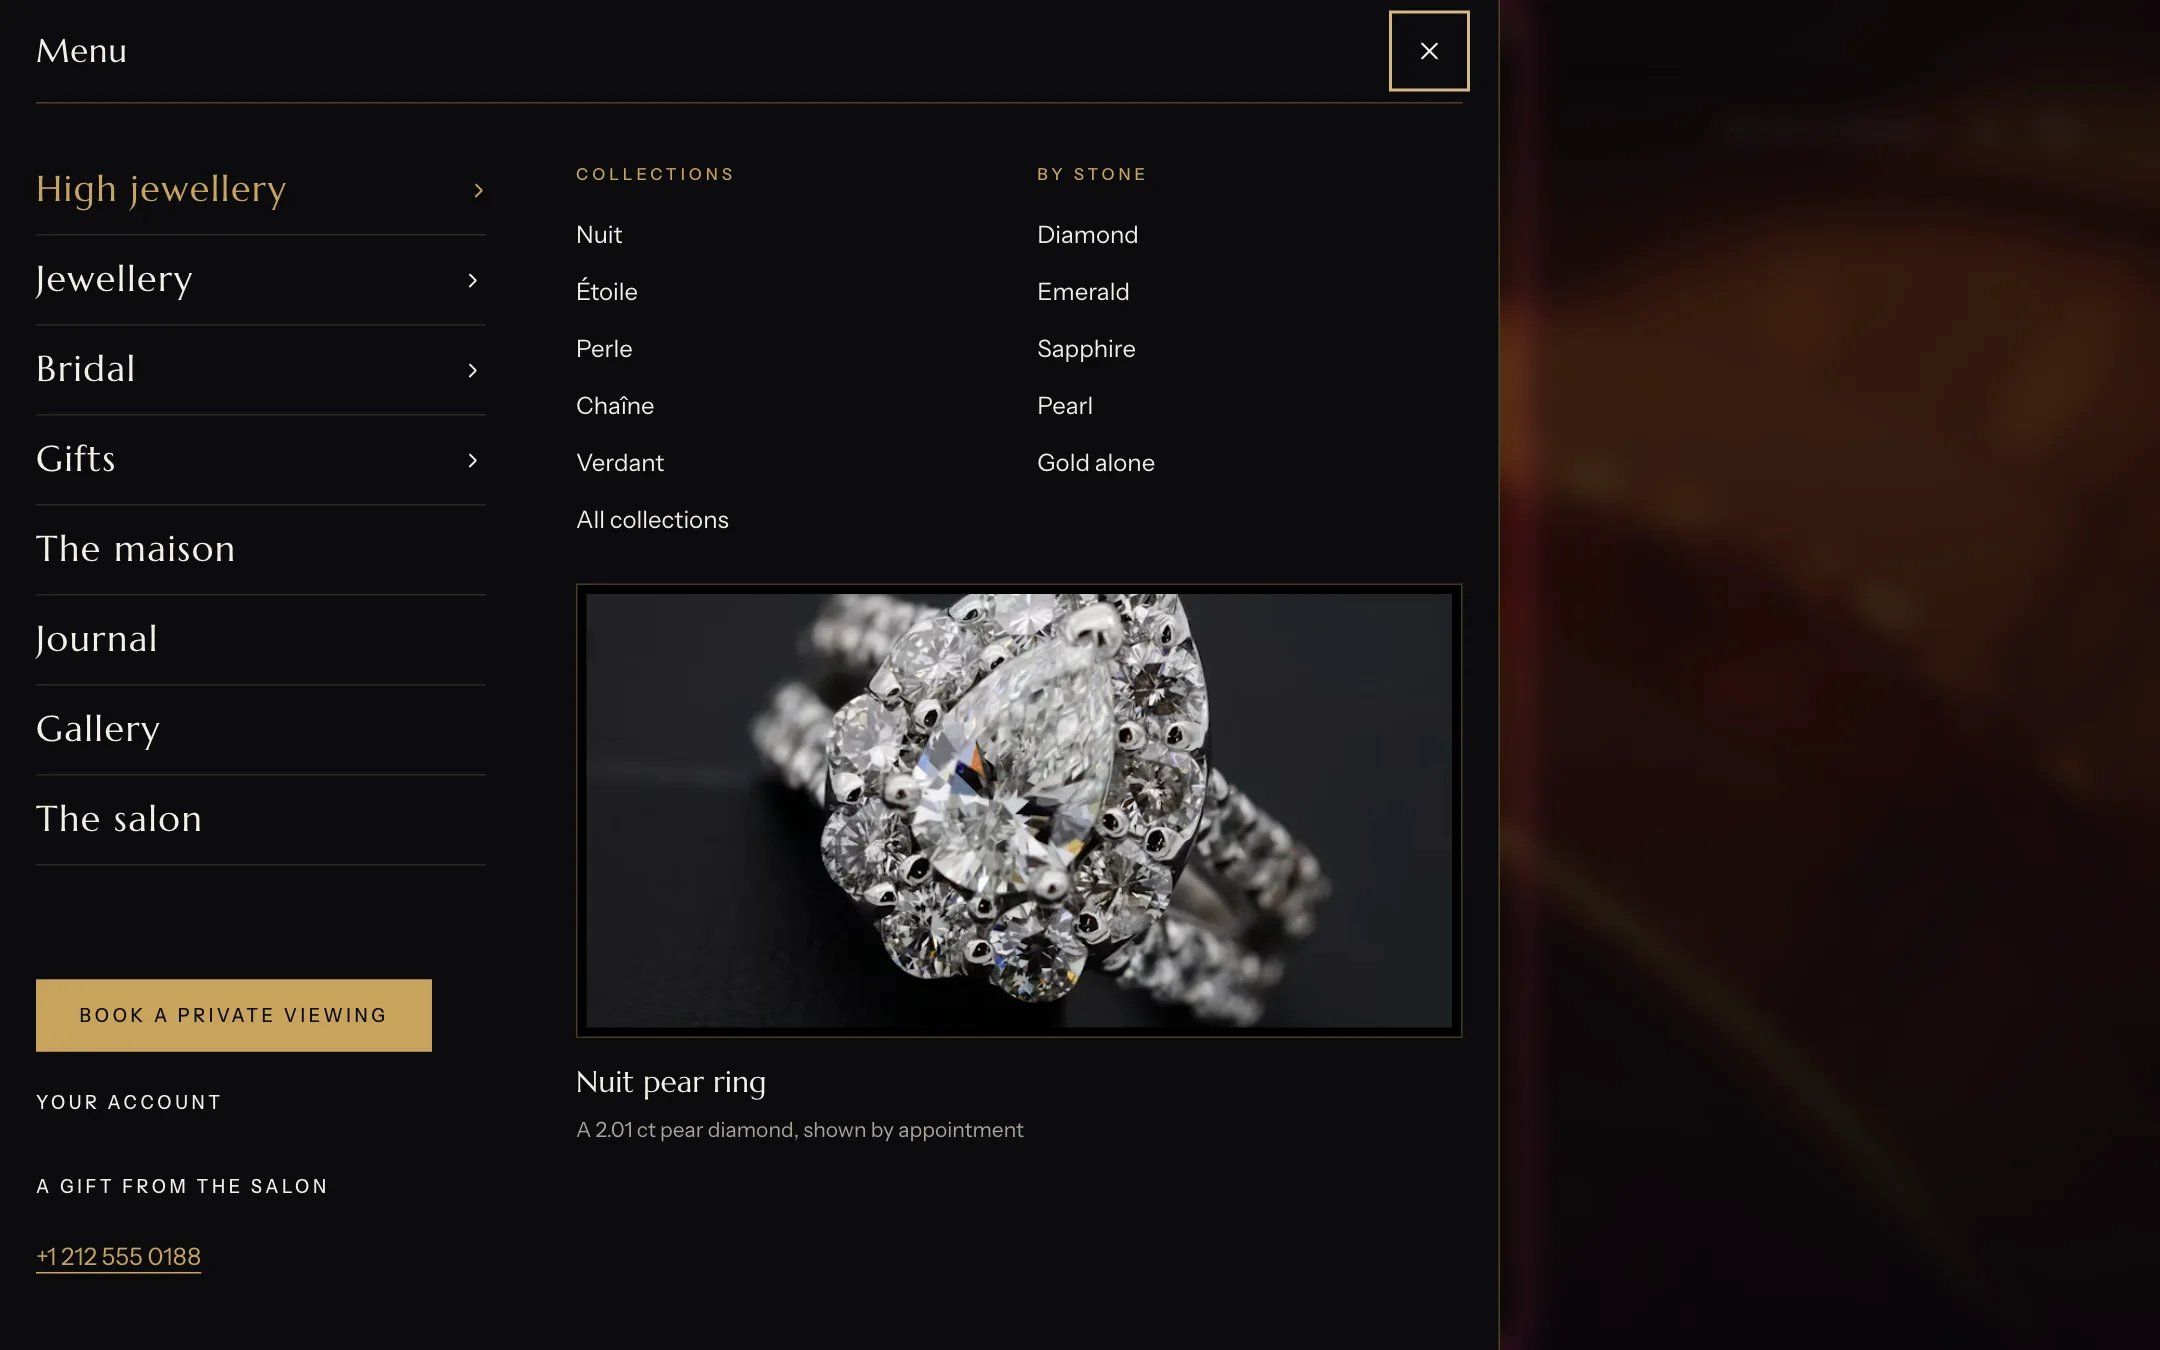
2. Add menu promos. In the theme editor select Header and add a Menu promo block. Type the title of a top-level item exactly as it is in Navigation, then add an image, title, text and link. The promo shows beside that item’s columns.
The drawer mega menu

The drawer mega menu with a menu promo

3. Finish the drawer. In the Header section, set the Menu drawer button (for example Book a private viewing to your contact page), a telephone number, and Show country and language selectors if you sell in several markets or languages. 4. The service link. Service link, Label and Link add a link beside the account button on tablets and desktops, for example Private viewing. 5. Footer menus. Add a Menu block per footer column and choose a menu, such as Client care, The maison and Legal. 6. Account menu. The account button is Shopify’s own account menu. Choose the menu it shows under Customer account menu (default customer-account-main-menu), and turn on customer accounts in Settings, Customer accounts. Collection navigation. For links between collections above the product grid, create a menu of collection links and choose it under Collection navigation in the Collection section.

In the theme editor

Header in the theme editor

1 Header, with Add Menu promo · 2 Menu and Customer account menu · 3 the header in the preview