
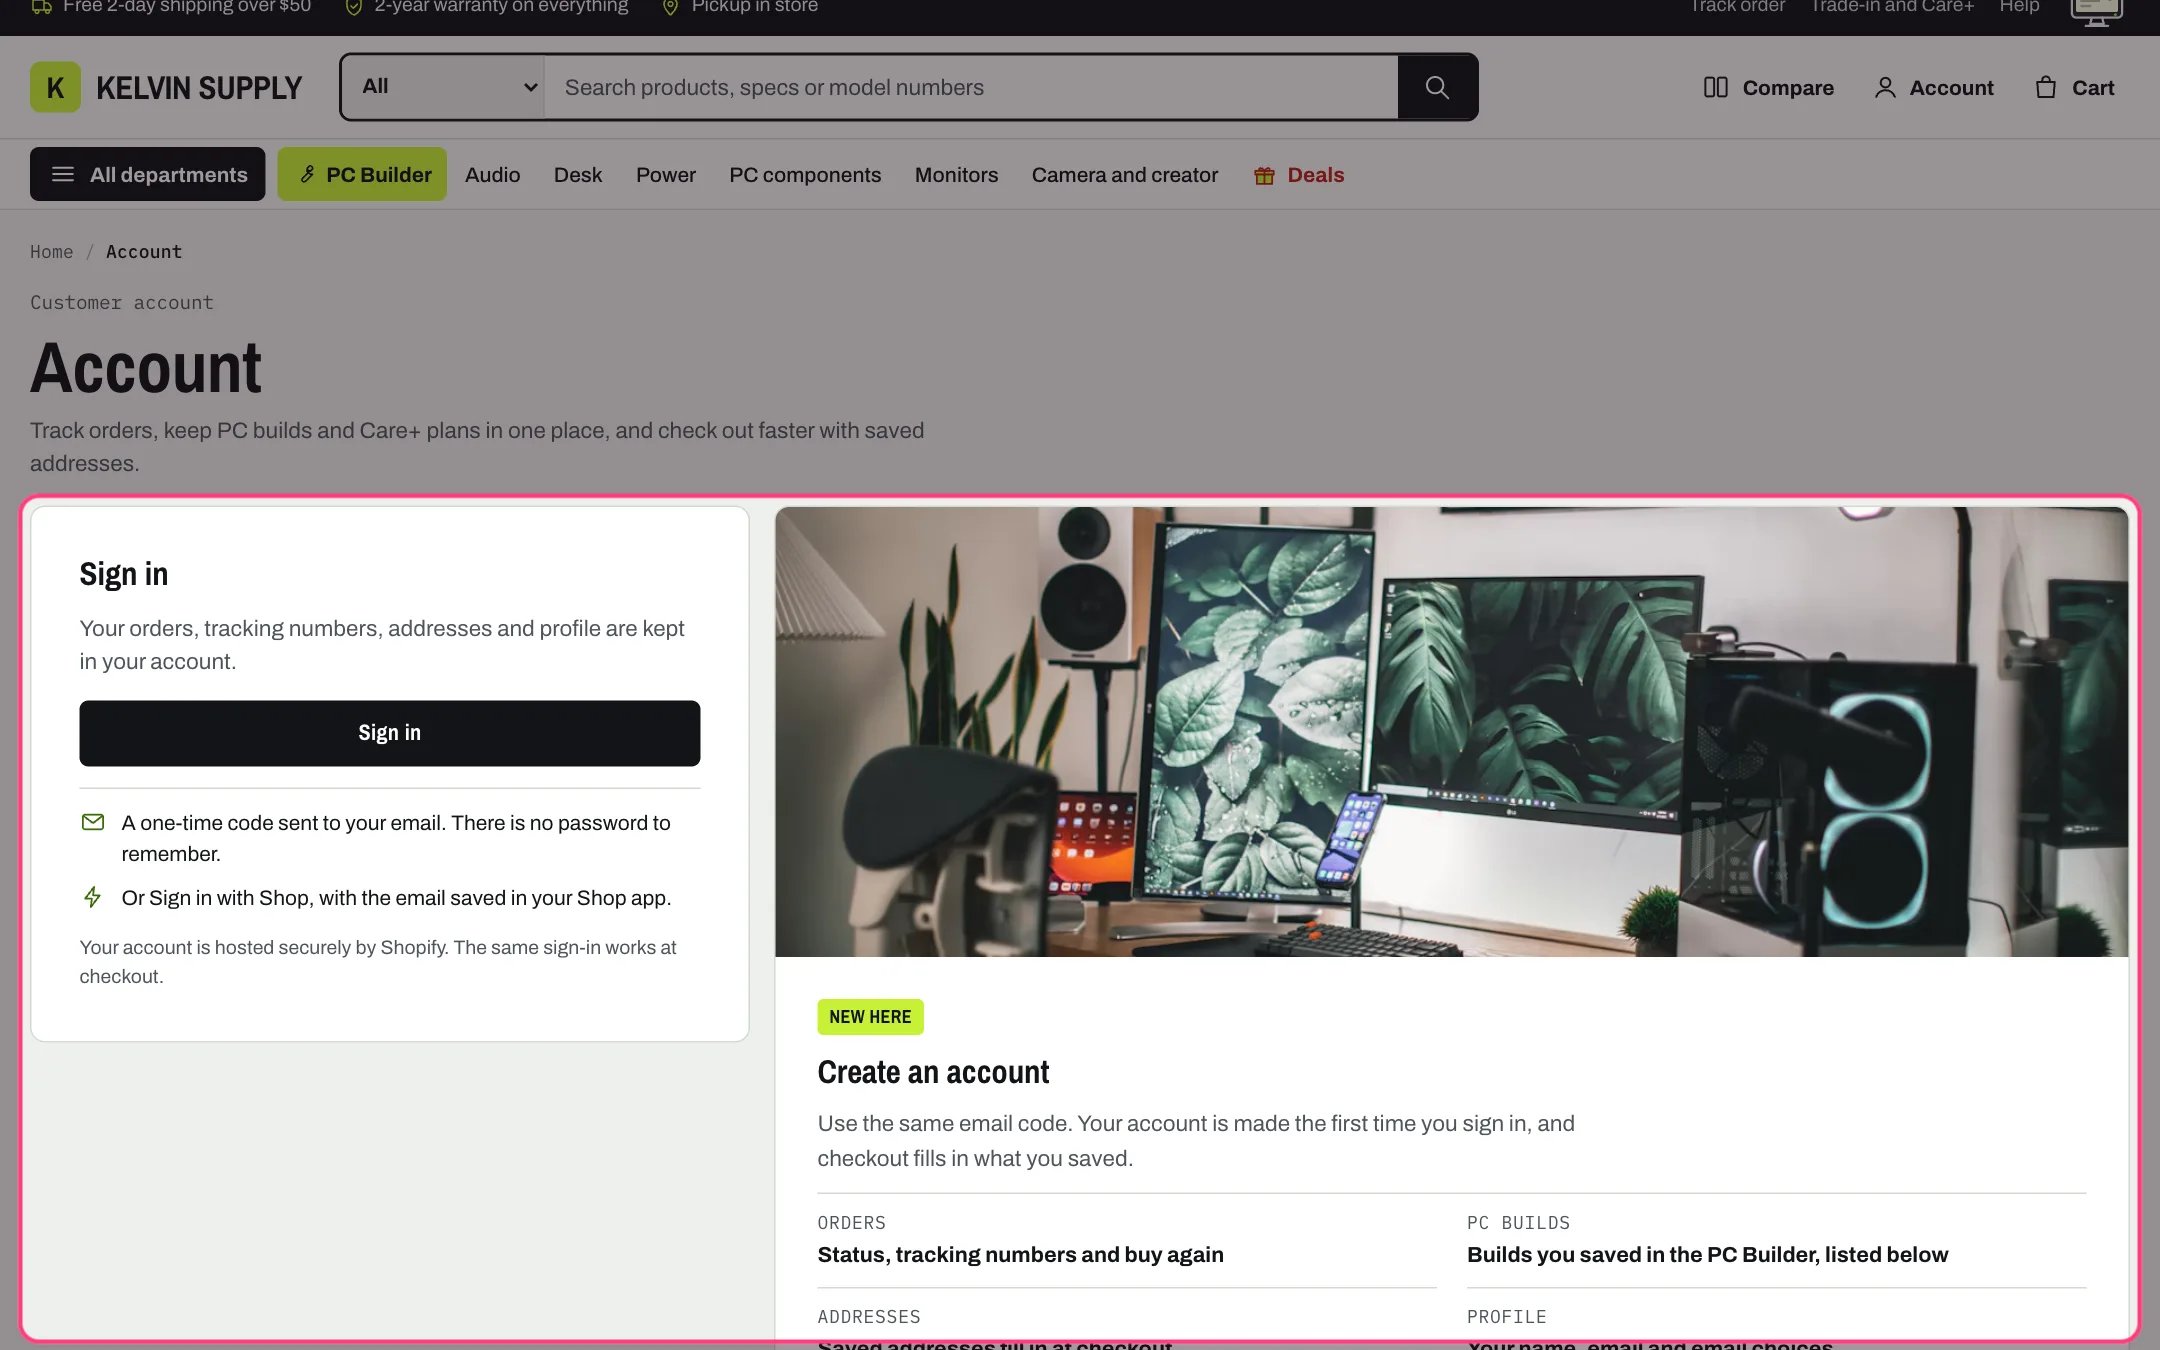
Account, highlighted with the demo content
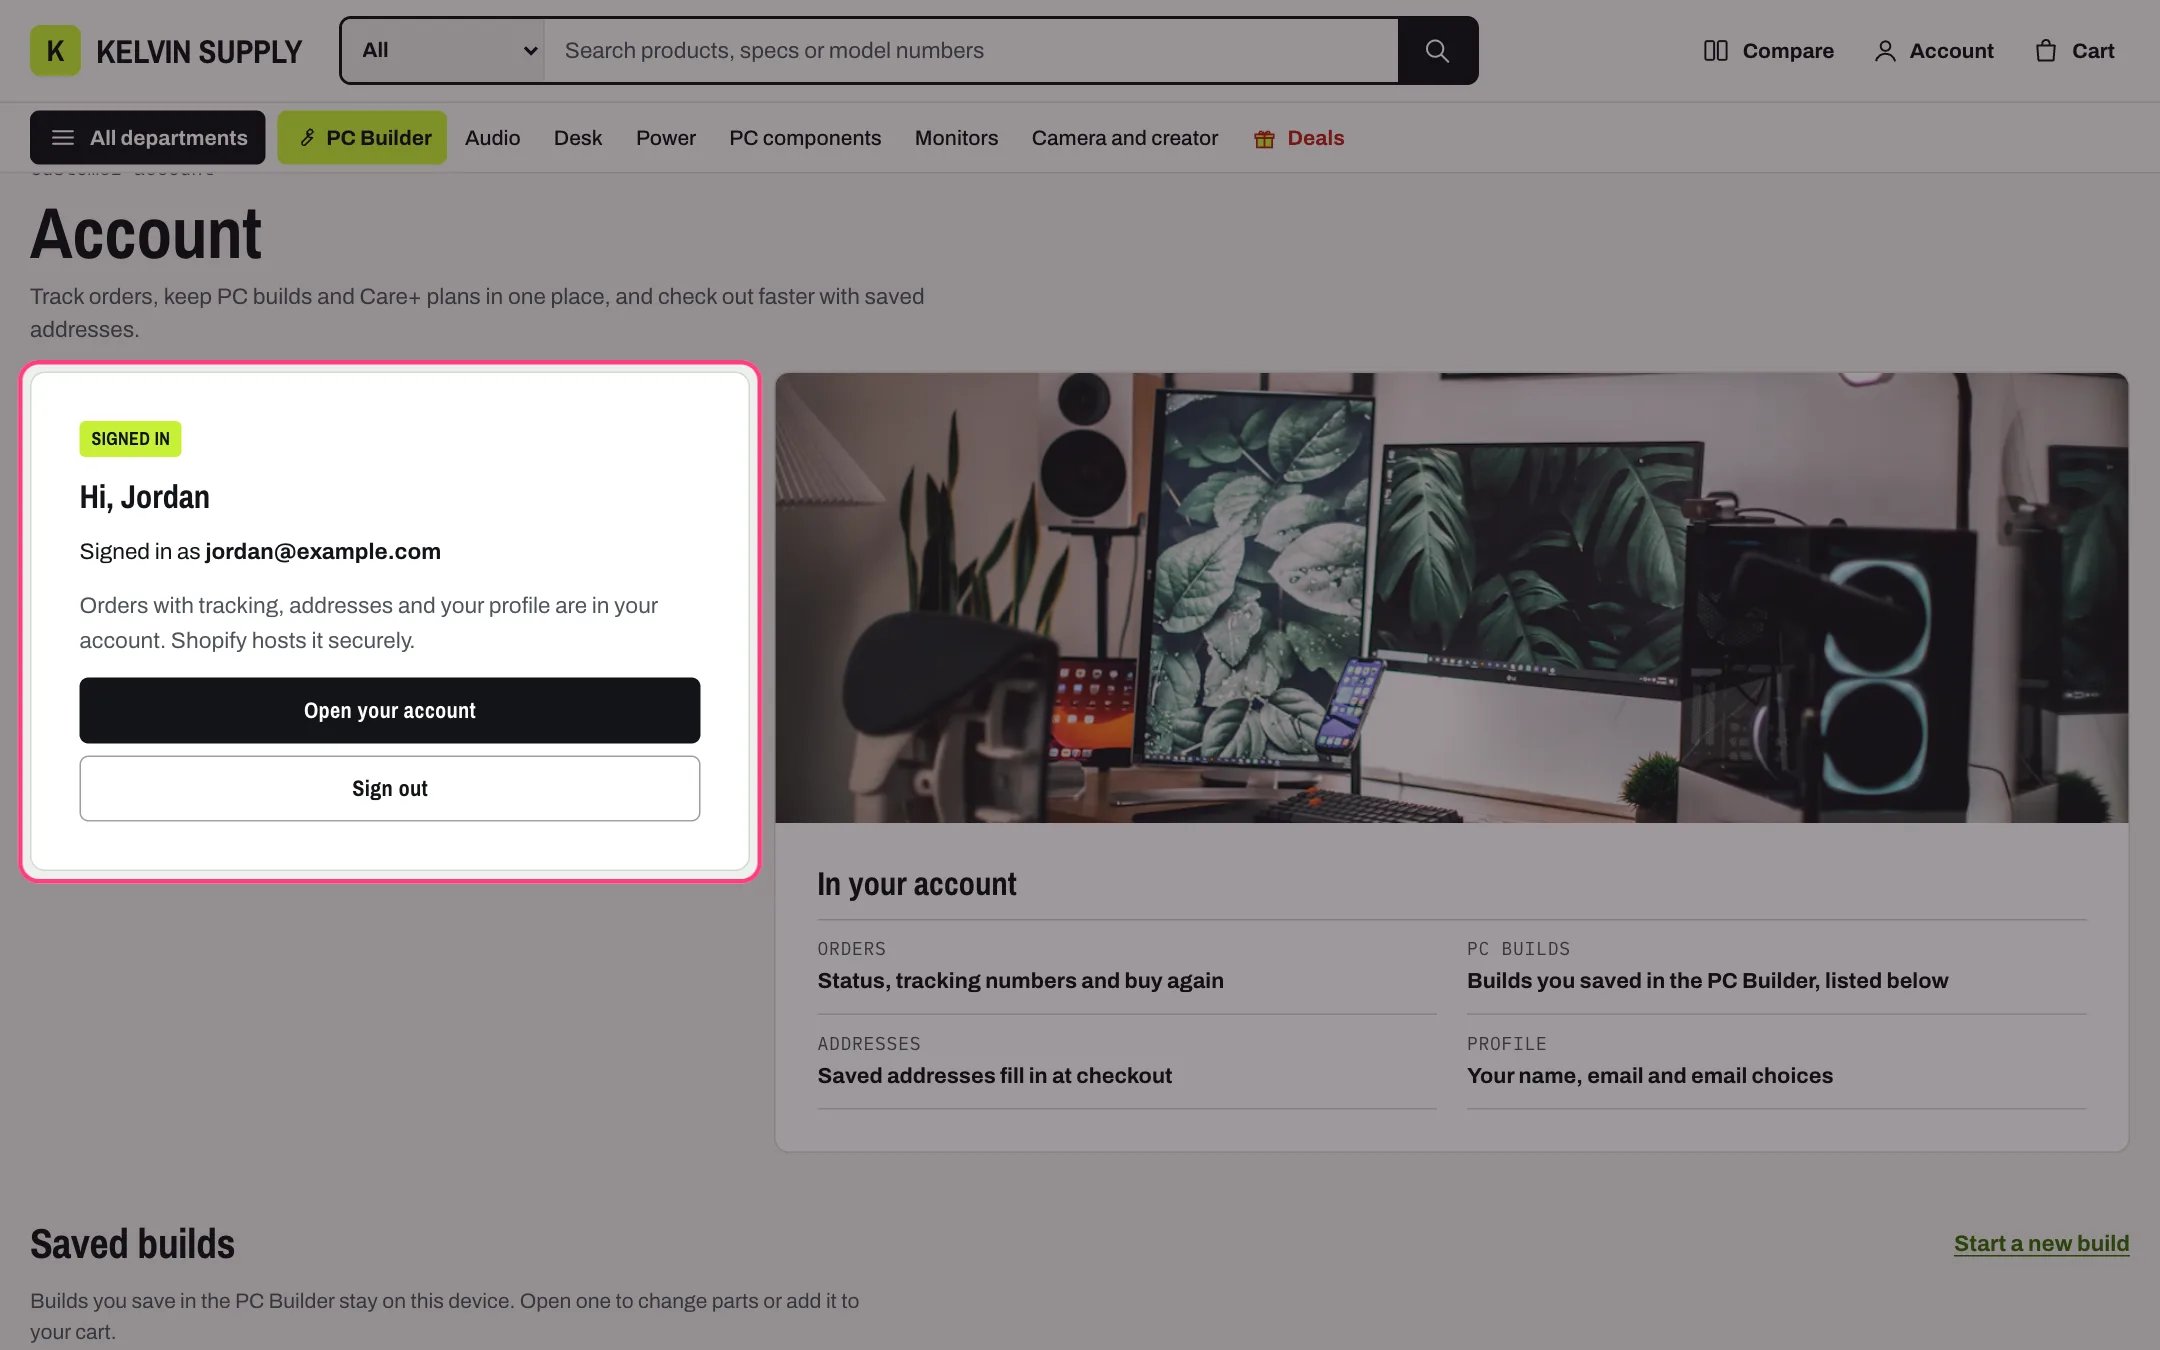
Signed in: a greeting, the email, Open your account and Sign out
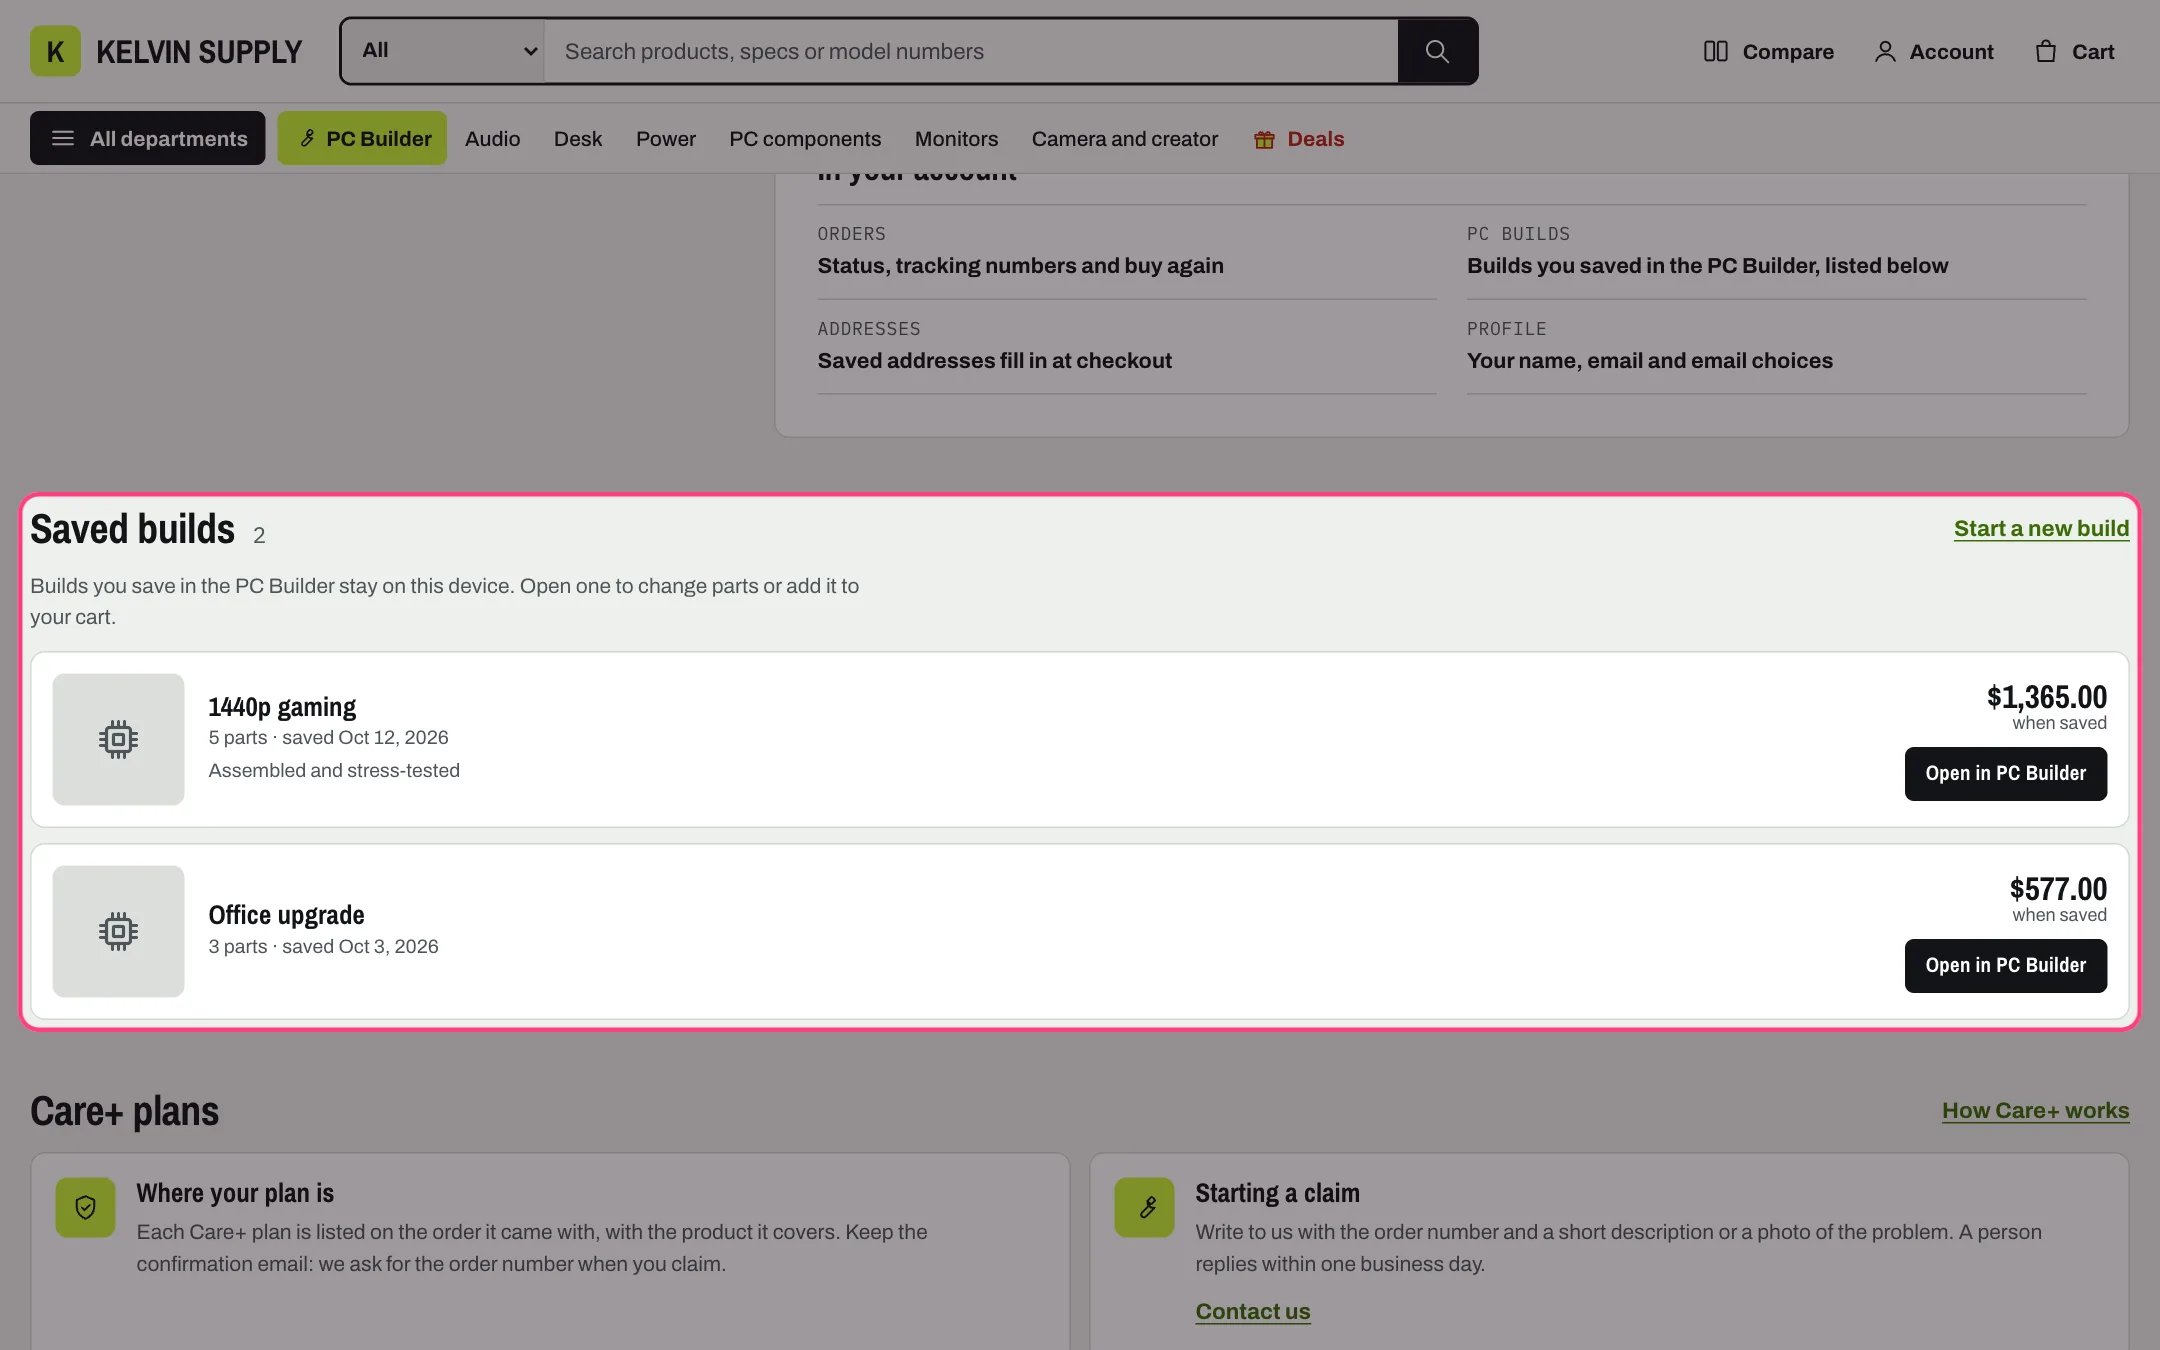
Saved builds, kept on the shopper’s device, with Open in PC Builder
Where to find it
The page.account template. Create a page in Online Store → Pages (for example Account), choose account under Theme template, and add the page to a menu: Kelvin does not link it anywhere on its own. In the theme editor choose Pages, then account, and select Account.How it works
- Signing in, orders, tracking, addresses and the profile are Shopify’s own customer account pages, hosted by Shopify and opened from the account icon in the header. This page explains them and links to them.
- Signed out, the first panel shows the Sign in heading and text, a Sign in button and two lines on how signing in works: a one-time code sent by email, or Sign in with Shop. The second panel shows the Label (New here on install), the Create an account heading and text, your Account perk blocks and a Create an account button.
- Signed in, the first panel greets the customer by first name, shows the email they signed in with, and offers Open your account and Sign out. The second panel shows the Heading when signed in (In your account) over the same perks.
- When customer accounts are off in Settings → Customer accounts, the first panel says that order updates come by email, and there are no sign-in buttons.
- Saved builds lists the PC builds the shopper saved in the PC Builder on this device, newest first, up to ten: the build’s name, its number of parts, the date it was saved, its total when saved, and Assembled and stress-tested when the build included assembly. Open in PC Builder opens the build so the shopper can change parts or add it to the cart.
- Saved builds are kept in the shopper’s browser, not in their Shopify account: the same list shows signed in or out, and a build saved on a phone does not show on a laptop. With none saved, the list says so and links to the PC Builder.
- Care+ information blocks show as cards under the Care+ plans heading, each with an icon, a heading, text and an optional link. The heading, and the See how Care+ works link once it has a Link, show only when there is at least one block.
- The heading is the page title unless you type one, and it is the page’s main heading. Above 1000 px the two panels sit side by side; on smaller screens they stack.
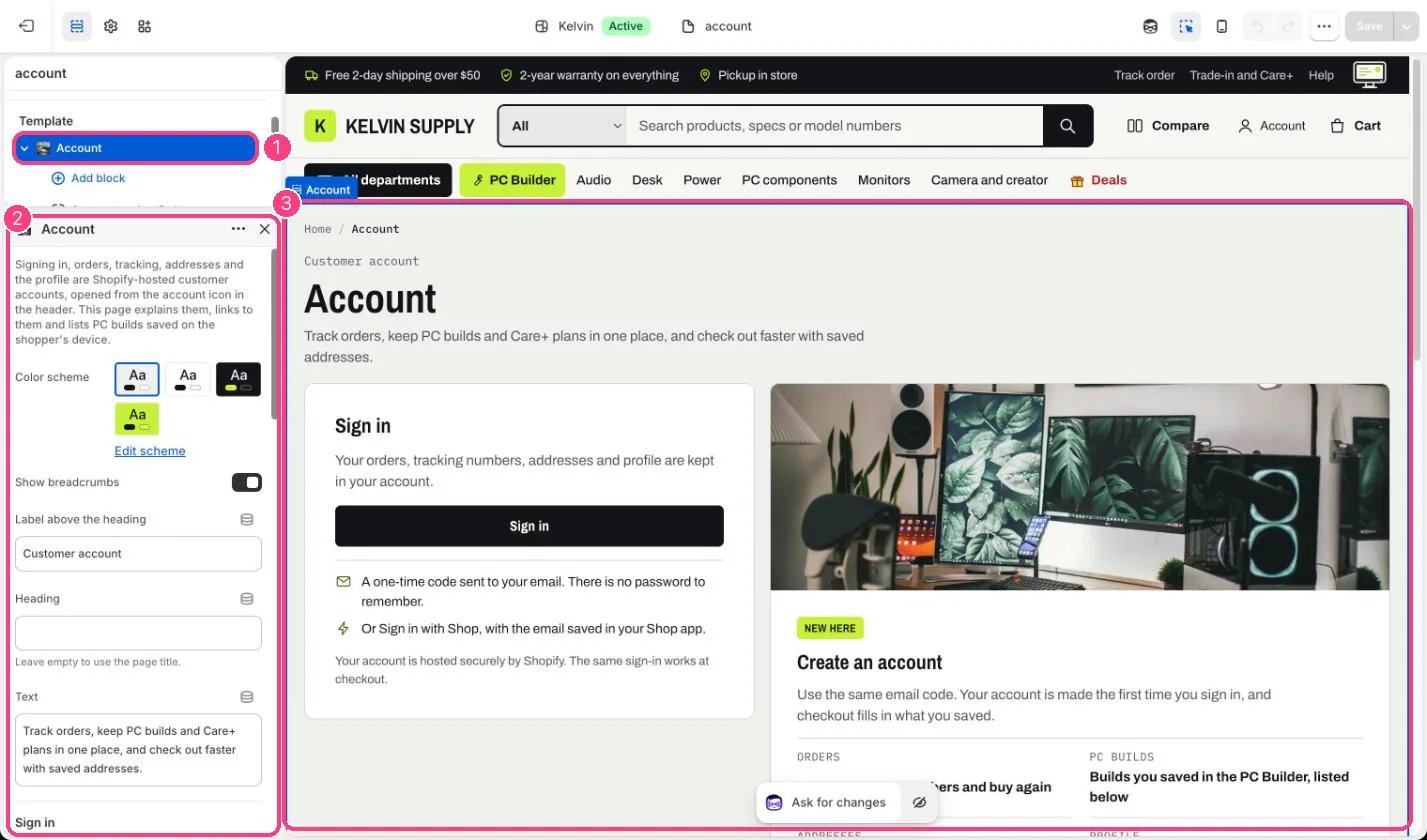
In the theme editor: 1 the section in the sidebar · 2 its settings · 3 the section in the preview
Edit it
- Choose your PC Builder page in Theme settings → PC Builder. Without it, saved builds have no Open in PC Builder button and the Start a new build link is hidden.
- Edit the Account perk blocks (Heading and Text) so they describe what your customers find in their account. Four short perks fill two neat rows.
- Add a Photo under Account perks: it sits above the perks, cropped wide (3:1) around the photo’s focal point, so use a landscape photo, 1800 x 600px recommended.
- Turn off Show saved PC builds if you do not use the PC Builder, and remove the PC builds perk with it.
- Add Care+ information blocks for your protection plans, and set the Link under Care+ information to your Care+ page so See how Care+ works shows. On install the Starting a claim block holds guidance text: replace it with what you need for a claim and how soon you reply.
- Keep Text to one sentence: it sits under the heading.
Settings
Sign in
Account perks
Saved PC builds
Care+ information
Blocks
Up to 12 blocks. Add a block with Add block under the section in the sidebar; drag blocks to reorder them.Account perk
Care+ information
Saved builds live only on the shopper’s device: clearing the browser’s site data removes them.