
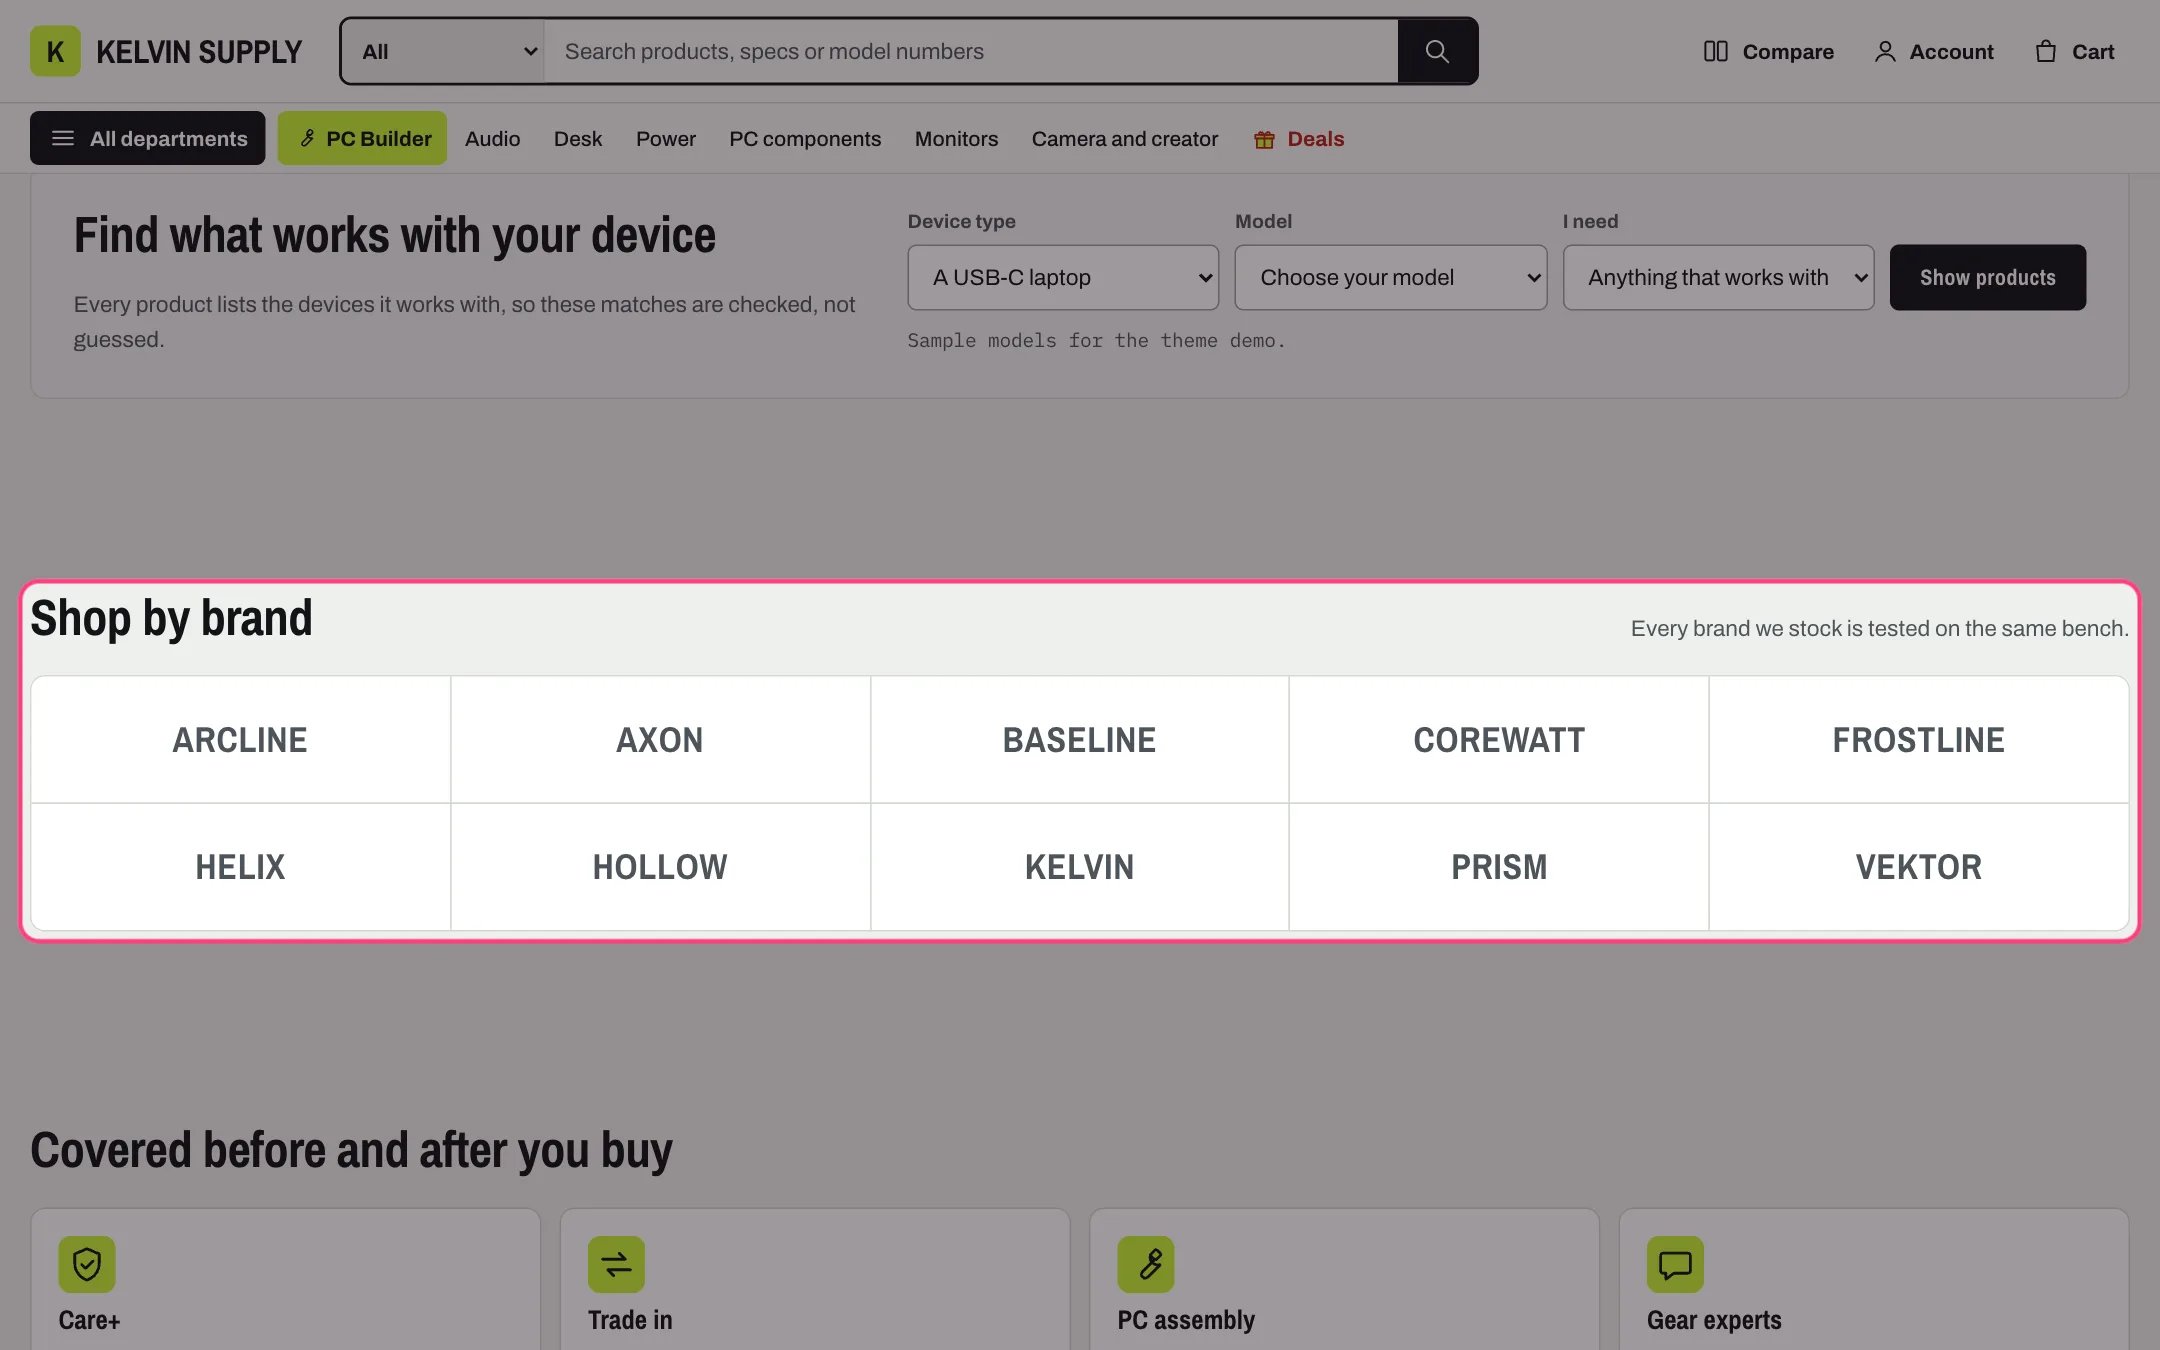
Brands, highlighted with the demo content
Where to find it
Home page. In the theme editor choose Home page in the page selector, then select Brands.How it works
- With List your brands automatically on, the section lists up to 24 of your product vendors from A to Z, each linking to a page of that vendor’s products.
- Brand name style Wall shows the names as tiles in a grid: 5 per row on desktop, 3 at 900 px and narrower, 2 on phones. Chips shows them as rounded buttons.
- Logo blocks add a wall of logos above the names. A logo links to its Link, or to the brand’s products when only Brand name is set.
- Logo for dark mode replaces the logo while the shopper uses dark mode. Logos are never recolored; without a dark version the same logo shows in both modes.
- A Logo block without a logo shows its Brand name as text. Logos fit inside 160 by 48 px.
- The section is hidden when the automatic list is off or finds no vendors and there are no Logo blocks. In the theme editor a note shows in its place.
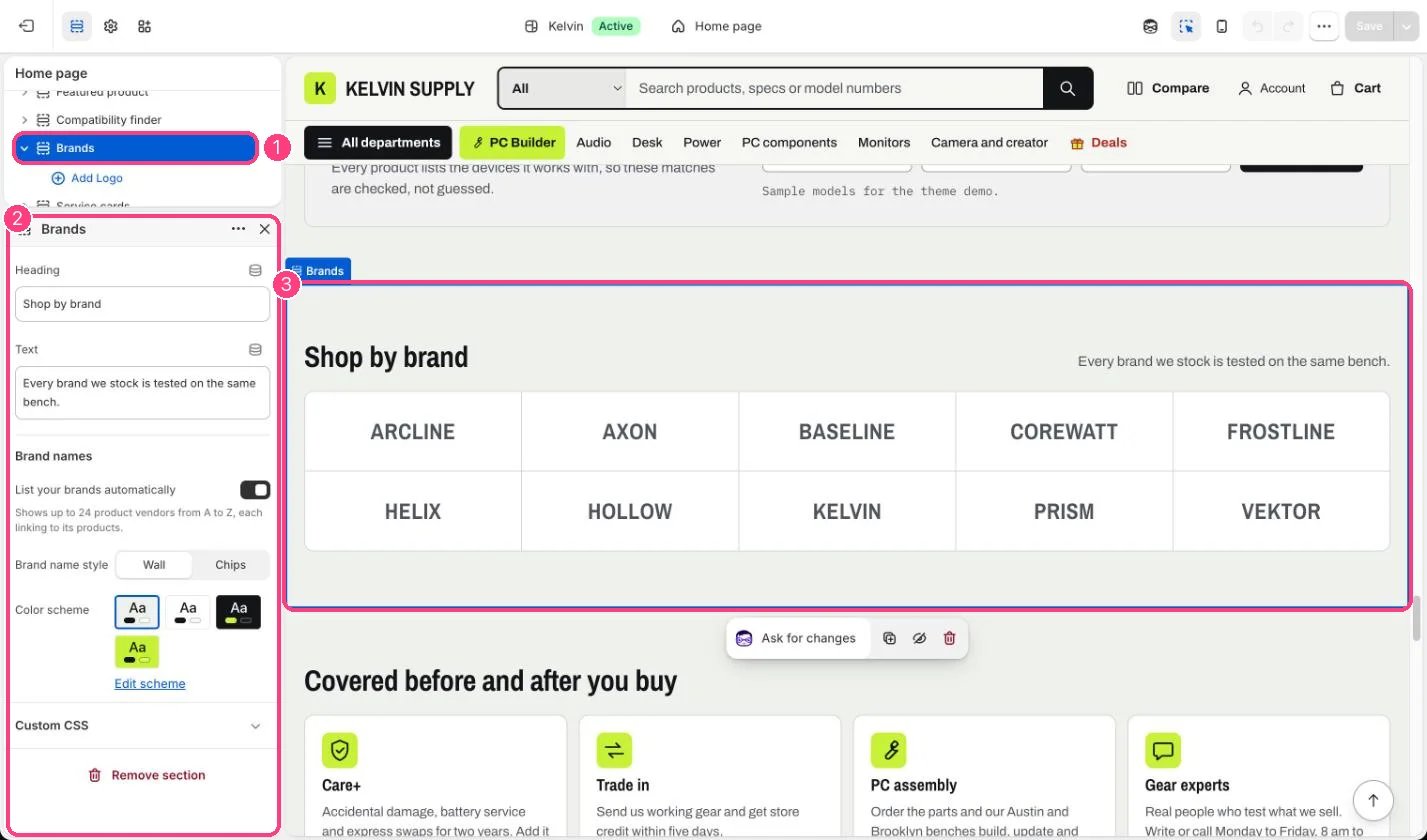
In the theme editor: 1 the section in the sidebar · 2 its settings · 3 the section in the preview
Edit it
- Fill in the Vendor field on your products: the automatic list reads it.
- For logos, add a Logo block per brand (up to 24) and turn off List your brands automatically if you want logos only.
- Upload each Logo on a transparent background, about 320 px wide, and a light version as Logo for dark mode.
- Type the Brand name: screen readers read it as the logo’s description.
- Edit Heading and Text, and choose Brand name style.
Settings
Brand names
Blocks
Up to 24 blocks. Add a block with Add block under the section in the sidebar; drag blocks to reorder them.Logo
On a new store every product often has the store name as its vendor, so the wall shows a single tile until vendors are filled in.