
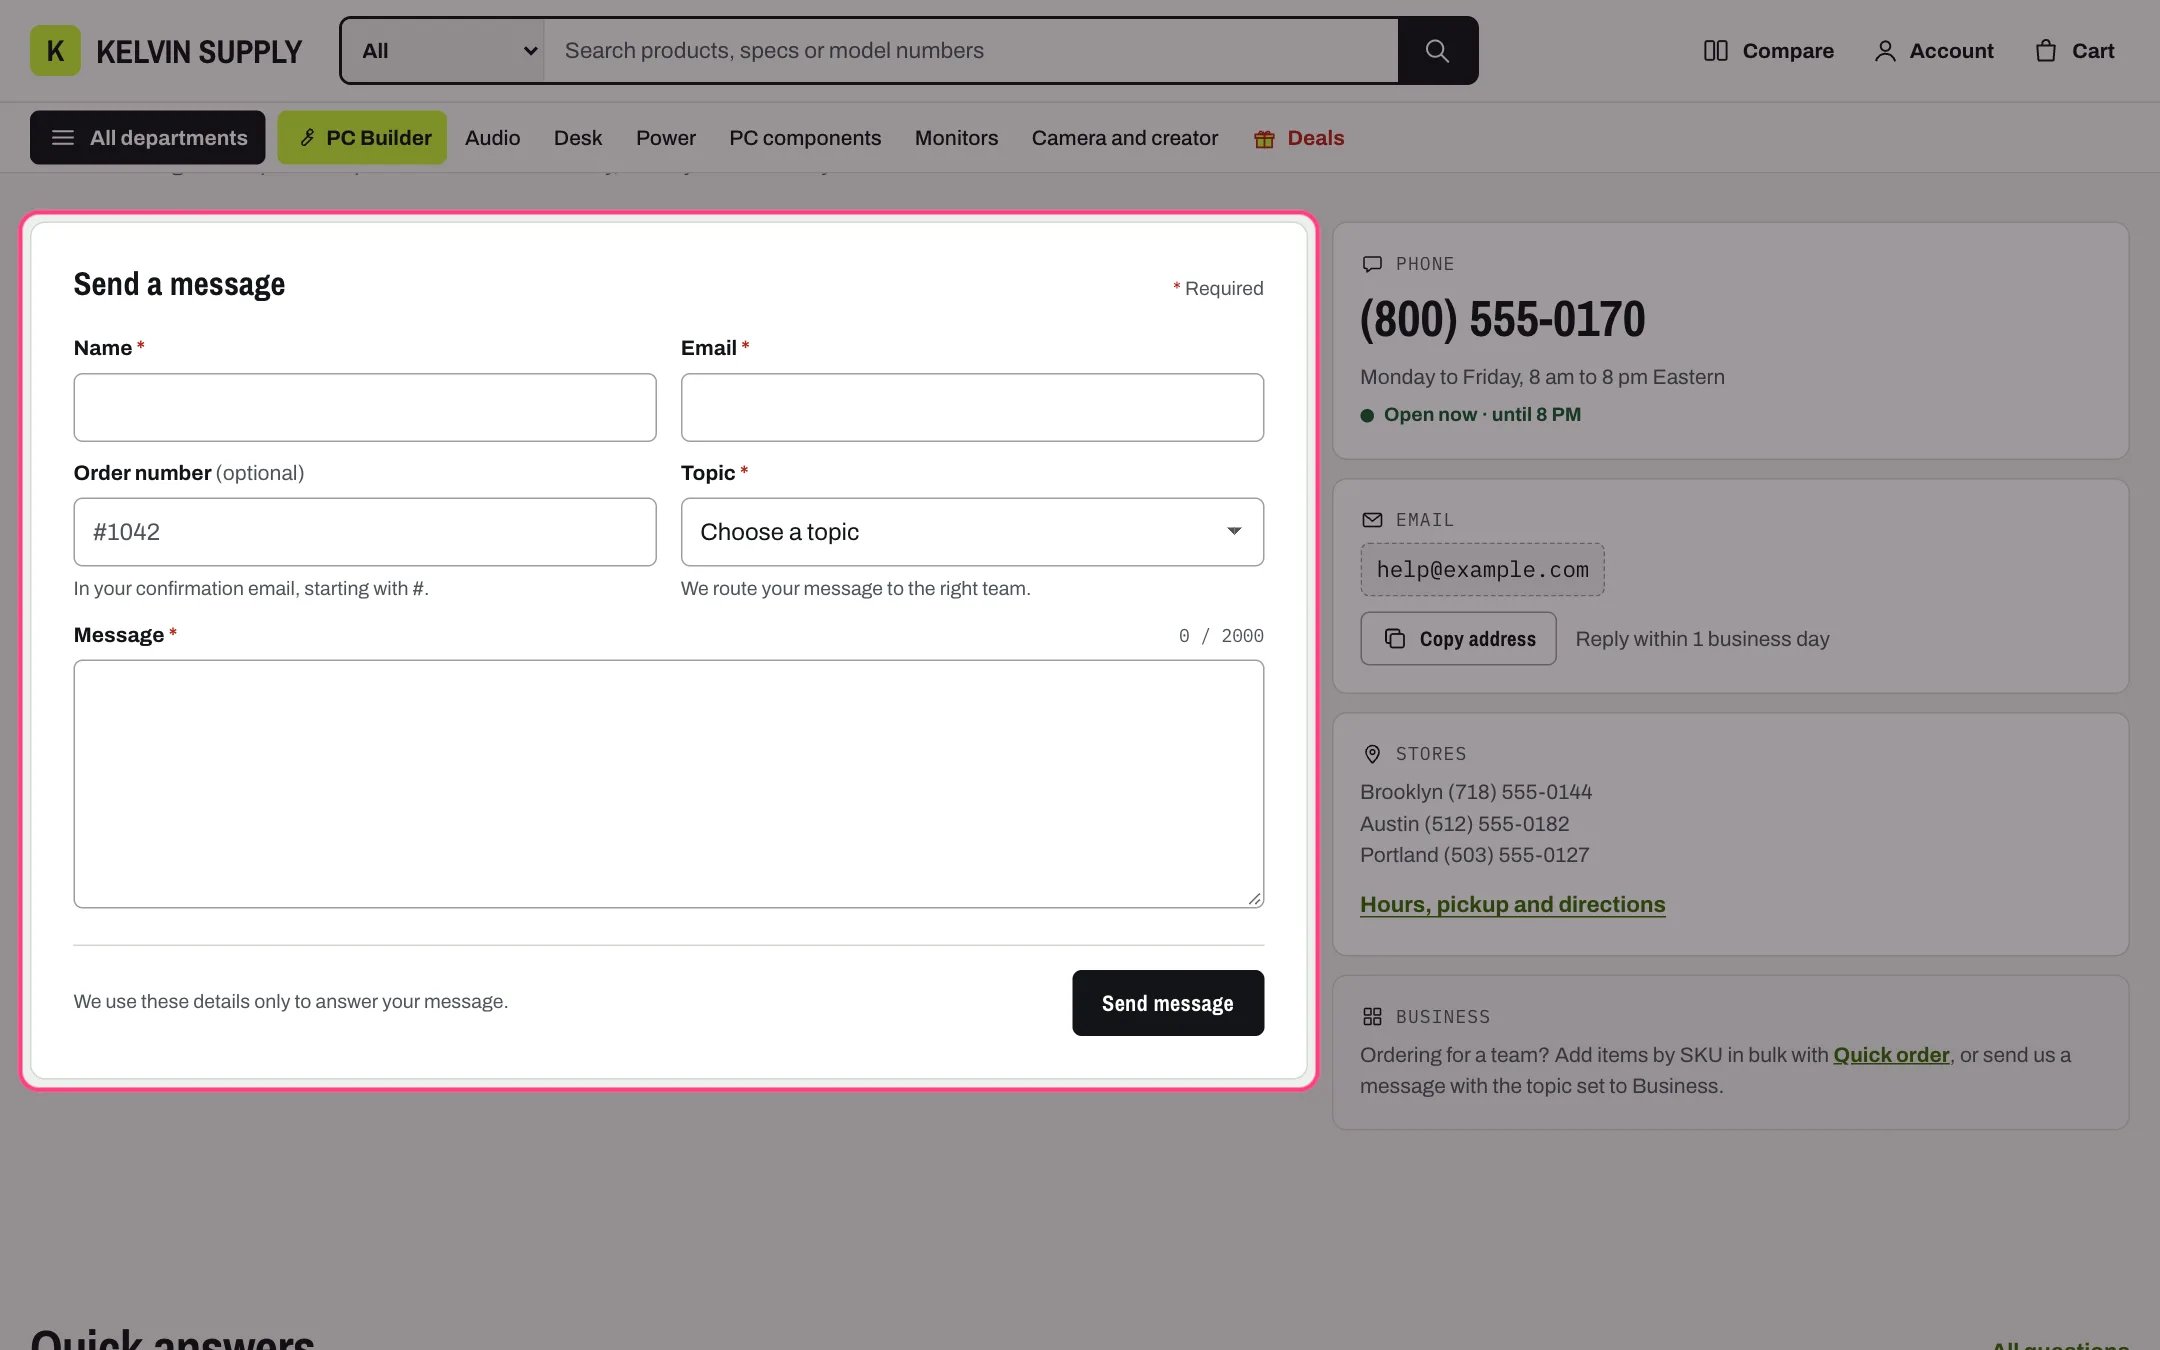
Contact form, highlighted with the demo content
Where to find it
The contact template (page.contact), shown on the demo at /pages/contact. Create a page in Online Store → Pages (or open the Contact page Shopify may already have), choose contact under Theme template and save. In the theme editor choose Pages, then contact, and select Contact form. The template also has Page heading and the FAQ section (Quick answers).How it works
- Messages arrive at the sender email set in Settings → Notifications.
- Each Form field block adds a field; its Label names the answer in the email you receive. The first Email field is the address you reply to, and if there is none the form adds a required Email field first.
- Long text fields are always full width, and Character limit adds a counter. Half width puts two fields side by side on wide screens; under 750 px fields stack.
- The Topic block is a drop-down of your Topics. A hint after a vertical bar shows under it when that topic is chosen, and a link ending in ?topic= and the topic name, such as /pages/contact?topic=warranty-claim, chooses it.
- Mistakes show at the field: a required field left empty, an incomplete email address or a phone number with letters. Fields are checked when shoppers leave them and again on Send; errors returned by Shopify show in a summary at the top, which takes focus.
- With Keep an unsent message on, what a shopper types is kept on their device; if they leave and come back, the form shows We kept the message you started with a Clear the form button. It is cleared once the message is sent.
- After sending, the form is replaced by the After sending Heading and Text, a Send another message button and your link. A Link label without a Link goes to the home page.
- Phone, Email address and Text blocks show as panels beside the form, or under it below 1000 px. A Phone block with weekday hours shows an open or closed line for the phone line; an Email address block has a Copy address button.
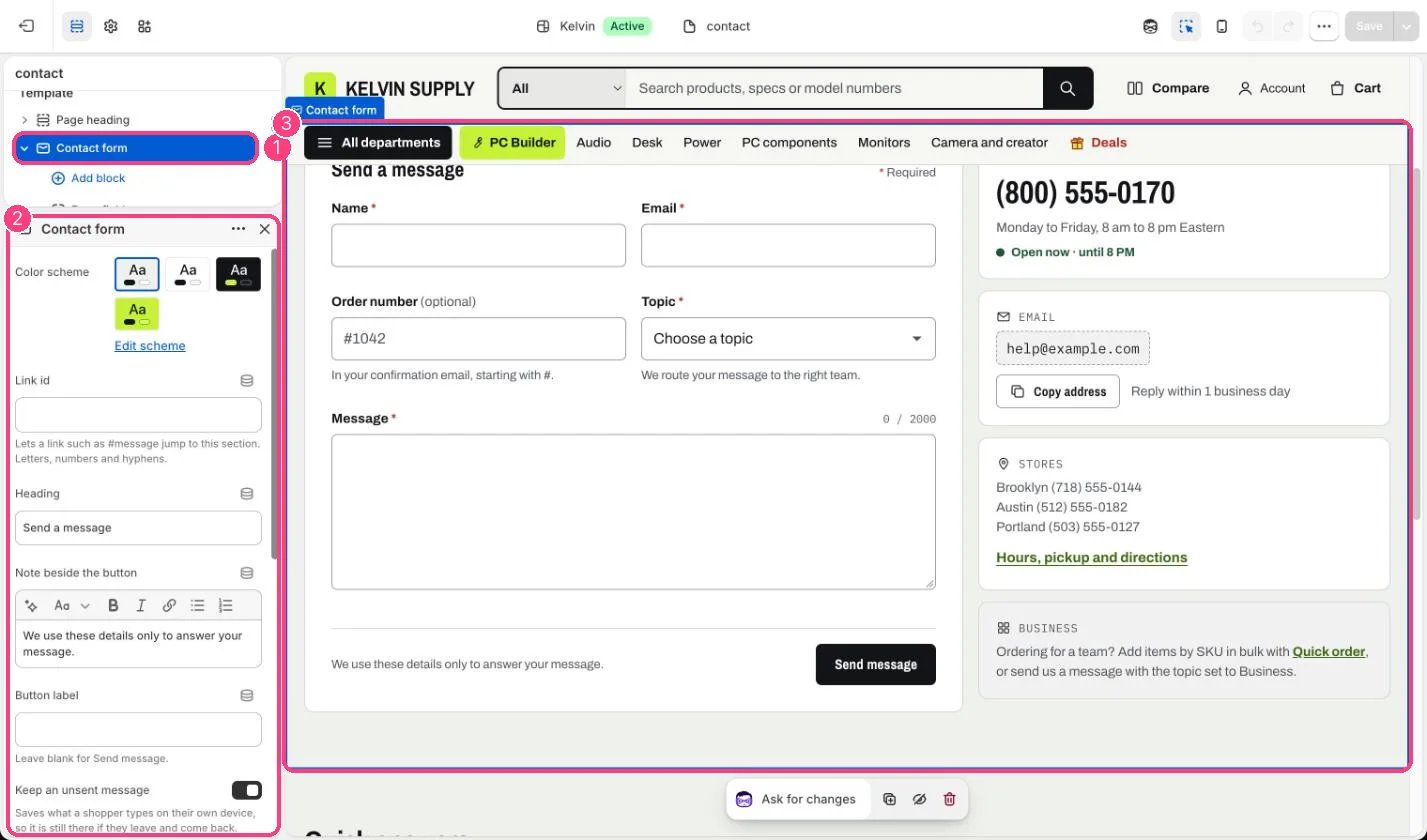
In the theme editor: 1 the section in the sidebar · 2 its settings · 3 the section in the preview
Edit it
- Add, remove and drag Form field blocks. Set Label, Type, Required, Placeholder, Hint and Width; type Drop-down options one per line for a drop-down.
- Set a Character limit on the message field, such as 2000.
- In the Topic block, type Topics one per line, with a hint after a vertical bar, such as
Returns | Add the order number. - Edit Heading, Button label and Note beside the button, and under After sending the Heading, Text, Link label and Link.
- Add a Phone block (up to 2) with Phone number and Hours text; fill in Monday to Sunday and Time zone for the open line, in the same format as Stores.
- Add an Email address block (up to 2), leaving Email address blank for the store’s contact email, and Text blocks (up to 4) for stores or business orders.
Settings
After sending
Blocks
Add a block with Add block under the section in the sidebar; drag blocks to reorder them.Form field
Topic (up to 1)
Phone (up to 2)
Open line
Email address (up to 2)
Text (up to 4)
Give every field a different Label: two fields with the same label share one entry in the email.Shopify’s contact form does not accept file uploads.On install there is no Phone block, the Email address block has no Note, and the Stores text block has no link until you add one. A new Phone block starts with Phone number and Hours text blank.